Java Streams, introduced in Java 8, have revolutionized the way developers work with data collections. They provide a concise and expressive way to perform operations on sequences of data, making code more readable and maintainable. In this detailed tutorial, we’ll explore Java Streams from the ground up, covering everything from the basics to advanced techniques.
Table of Contents
Introduction to Java Streams
Creating Streams
2.1. From Collections
2.2. From Arrays
2.3. Stream.of
2.4. Stream.builder
Intermediate Operations
3.1. Filter
3.2. Map
3.3. FlatMap
3.4. Sorted
3.5. Peek
Terminal Operations
4.1. forEach
4.2. toArray
4.3. collect
4.4. reduce
4.5. min and max
4.6. count
Parallel Streams
Stream API Best Practices
Advanced Stream Techniques
7.1. Custom Collectors
7.2. Stream of Streams
7.3. Grouping and Partitioning
Real-World Examples
8.1. Filtering Data
8.2. Mapping Data
8.3. Aggregating Data
Performance Considerations
Conclusion
1. Introduction to Java Streams
Java Streams are a powerful addition to the Java programming language, designed to simplify the manipulation of collections and arrays. They allow you to perform operations like filtering, mapping, and reducing in a more functional and declarative way.
Key characteristics of Java Streams:
Sequence of Data: Streams are a sequence of elements, whether from collections, arrays, or other sources.
Functional Style: Operations on streams are expressed as functions, promoting a functional programming paradigm.
Lazy Evaluation: Streams are evaluated on demand, making them efficient for large datasets.
Parallel Processing: Streams can easily be processed in parallel to leverage multi-core processors.
2. Creating Streams
2.1. From Collections
You can create a stream from a collection using the stream() method:
You can find the minimum and maximum elements using min and max:
Stream<Integer> numbers = Stream.of(1, 2, 3, 4, 5);
Optional<Integer> min = numbers.min(Integer::compareTo);
Optional<Integer> max = numbers.max(Integer::compareTo);
4.6. count
count returns the number of elements in the stream:
Stream<String> names = Stream.of("Alice", "Bob", "Charlie");
long count = names.count();
5. Parallel Streams
Java Streams can be easily parallelized to take advantage of multi-core processors. You can convert a sequential stream to a parallel stream using the parallel method:
While Streams offer convenience, improper use can impact performance. Be mindful of:
Stream Size: Large data sets may lead to excessive memory usage.
Parallel Streams: Use with caution; not all tasks benefit from parallelism.
Statelessness: Ensure lambda expressions used in stream operations are stateless.
Avoiding Excessive Intermediate Operations: Minimize unnecessary filtering and mapping.
10. Conclusion
Java Streams are a versatile and powerful tool for working with data in a functional and declarative manner. By mastering the concepts, operations, and best practices outlined in this tutorial, you’ll be well-equipped to write clean, efficient, and expressive code that makes the most of Java’s stream processing capabilities.
Java lambda expressions revolutionized the way we write code by introducing functional programming concepts to the language. Lambda expressions allow us to write more concise and expressive code, enhancing readability and promoting modular design. In this tutorial, we’ll explore lambda expressions in Java, covering their syntax, common use cases, and best practices.
Table of Contents:
What are Lambda Expressions?
Syntax of Lambda Expressions
Functional Interfaces
Working with Lambda Expressions
Using Lambda Expressions as Method Arguments
Assigning Lambda Expressions to Variables
Lambda Expressions with Multiple Parameters
Accessing Variables from the Enclosing Scope
Method References vs. Lambda Expressions
Benefits of Lambda Expressions
Common Use Cases
Best Practices for Using Lambda Expressions
Conclusion
Section 1: What are Lambda Expressions?
Lambda expressions are a feature introduced in Java 8 that allows you to write more concise and expressive code by treating functionality as a first-class citizen. In simple terms, lambda expressions enable you to represent anonymous functions as values.
In traditional Java programming, you would typically define an interface with a single abstract method and create an instance of a class that implements that interface to provide the implementation for that method. Lambda expressions provide a more compact alternative by allowing you to define the implementation of the method directly inline, without the need for a separate class.
Lambda expressions are often used in conjunction with functional interfaces, which are interfaces that have exactly one abstract method. The lambda expression provides an implementation for that method, making it a concise way to represent behavior.
The key idea behind lambda expressions is to treat behavior as a value that can be passed around, assigned to variables, and used as method arguments. This functional programming approach promotes modularity and flexibility in your code.
Section 2: Syntax of Lambda Expressions
Lambda expressions consist of three main parts:
Parameters: These are the input parameters that the lambda expression takes. If there are no parameters, you can leave the parentheses empty. If there are multiple parameters, separate them with commas.
Arrow Operator: The arrow operator (->) separates the parameters from the body of the lambda expression. It serves as a visual indicator that the parameters are used to produce the result defined by the expression.
Body: The body of the lambda expression represents the computation or action that the lambda expression performs. It can be a single statement or a block of statements enclosed in curly braces.
Here’s an example of a lambda expression that adds two numbers:
(int a, int b) -> a + b
In this example, the lambda expression takes two integer parameters (a and b) and returns their sum (a + b).
Lambda expressions are commonly used in functional programming constructs and APIs that accept functional interfaces. They enable you to write more expressive and concise code by representing behavior directly inline, without the need for additional classes and method declarations.
Lambda expressions have brought a significant shift in the way Java code is written, enabling developers to embrace functional programming concepts and write cleaner, more modular code.
Section 3: Functional Interfaces
Functional interfaces are a fundamental concept in Java that are closely related to lambda expressions and enable functional programming in the language. In simple terms, a functional interface is an interface that has exactly one abstract method. They provide a way to define the contract for a lambda expression or any other implementation of a single-method interface.
In Java, functional interfaces are annotated with the @FunctionalInterface annotation. While the annotation is not strictly required, it serves as a marker to indicate that the interface is intended to be used as a functional interface. The compiler will enforce the rule of having only one abstract method within an interface marked with @FunctionalInterface.
Functional interfaces can have default methods or static methods, but the key requirement is that they must have exactly one abstract method. This single abstract method represents the primary behavior that the interface expects to define. The other methods can provide additional utility or default implementations.
Java 8 introduced a set of functional interfaces in the java.util.function package to facilitate functional programming and lambda expressions. Some commonly used functional interfaces include:
Supplier<T>: Represents a supplier of results. It has a single abstract method T get() and does not take any arguments but returns a value.
Consumer<T>: Represents an operation that takes a single input argument and returns no result. It has a single abstract method void accept(T t).
Predicate<T>: Represents a predicate (a condition) that takes an argument and returns a boolean value. It has a single abstract method boolean test(T t).
Function<T, R>: Represents a function that takes an argument of type T and returns a result of type R. It has a single abstract method R apply(T t).
BiFunction<T, U, R>: Represents a function that takes two arguments of types T and U and returns a result of type R. It has a single abstract method R apply(T t, U u).
These functional interfaces provide a standardized way to represent common functional programming patterns and facilitate the use of lambda expressions.
By using functional interfaces, you can define behavior that can be passed as arguments to methods, stored in variables, and used as return types. Lambda expressions can be used to implement the single abstract method of a functional interface, allowing for concise and expressive code.
Functional interfaces play a crucial role in enabling functional programming constructs in Java and provide a foundation for leveraging the power of lambda expressions and writing more modular and flexible code.
Section 4: Working with Lambda Expressions
Lambda expressions can be used in various contexts, such as:
Method arguments: You can pass lambda expressions as arguments to methods. For example, when working with collections, you can use lambda expressions to define custom sorting or filtering logic.
Return values: Lambda expressions can be returned from methods. This is useful when you want to create flexible and reusable code components.
Assignments: You can assign lambda expressions to variables and use them as if they were objects.
Streams API: Lambda expressions are extensively used with the Streams API to perform operations on collections in a functional and declarative way.
Section 5: Method References vs. Lambda Expressions
Using Lambda Expressions as Method Arguments: Lambda expressions can be passed as arguments to methods, allowing you to define behavior inline without the need for separate classes or explicit implementations. This is commonly used in functional programming constructs and APIs that accept functional interfaces. For example:
In the above example, the forEach method of the List interface accepts a Consumer functional interface. Instead of explicitly implementing the Consumer interface with a separate class, we pass a lambda expression (n -> System.out.println(n)) that defines the behavior of consuming each element of the list.
Assigning Lambda Expressions to Variables: Lambda expressions can be assigned to variables of functional interface types. This allows you to reuse the lambda expression and provide a more descriptive name for the behavior it represents. For example:
Predicate<Integer> evenNumberFilter = n -> n % 2 == 0;
List<Integer> evenNumbers = numbers.stream()
    .filter(evenNumberFilter)
    .collect(Collectors.toList());
In this example, we create a variable evenNumberFilter of type Predicate<Integer>, which represents a lambda expression that checks if a number is even. We can then use this variable to filter the numbers list using the filter method of the Stream API.
Lambda Expressions with Multiple Parameters: Lambda expressions can take multiple parameters. If you have multiple parameters, separate them with commas. For example:
BiFunction<Integer, Integer, Integer> addFunction = (a, b) -> a + b;
int sum = addFunction.apply(3, 5);  // sum = 8
In this case, we define a lambda expression (a, b) -> a + b that represents a function that takes two integers (a and b) and returns their sum. We assign this lambda expression to a variable of type BiFunction<Integer, Integer, Integer> and then use it to compute the sum of two numbers.
Accessing Variables from the Enclosing Scope: Lambda expressions can access variables from the enclosing scope. These variables are effectively final or effectively effectively final, meaning they are not allowed to be modified within the lambda expression. This allows lambda expressions to capture and use values from the surrounding context. For example:
int factor = 2;
Function<Integer, Integer> multiplier = n -> n * factor;
int result = multiplier.apply(5);  // result = 10
In this example, the lambda expression (n -> n * factor) captures the factor variable from the enclosing scope. The factor variable is effectively final, and we can use it within the lambda expression to multiply the input value.

Working with lambda expressions allows you to write concise and expressive code by representing behavior directly inline. They provide a more modular and flexible way of defining behavior, making your code easier to read and maintain. By leveraging lambda expressions, you can achieve greater code clarity and focus on the core logic of your application.
Section 6: Benefits of Lambda Expressions
Lambda expressions in Java provide several benefits that make your code more concise, readable, and maintainable. Here are some of the key advantages of using lambda expressions:
Conciseness: Lambda expressions allow you to express instances of single-method interfaces (functional interfaces) more concisely. This reduction in boilerplate code makes your code cleaner and easier to understand.
Readability: Lambda expressions can make your code more readable by eliminating unnecessary details. They allow you to focus on the essential logic of a function or operation.
Expressiveness: Lambda expressions enable a more expressive syntax, making it clear what the code is doing. They often read like a sentence, improving the understanding of the programmer’s intent.
Flexibility: Lambda expressions make it easier to pass behavior as an argument to methods. This flexibility is especially useful when working with collections, sorting, filtering, or defining custom behavior.
Functional Programming: Lambda expressions promote functional programming practices in Java. You can write code in a more functional and declarative style, which can lead to more efficient and robust programs.
Parallelism: Lambda expressions are particularly useful when working with the Java Streams API. They allow you to take advantage of parallel processing easily, as operations can be expressed in a way that doesn’t depend on the order of execution.
Reduced Code Duplication: Lambda expressions can help reduce code duplication by allowing you to encapsulate reusable behavior in a concise form. This promotes the DRY (Don’t Repeat Yourself) principle.
Improved API Design: When designing APIs, lambda expressions can provide a more intuitive and user-friendly way for clients to interact with your code. It allows you to design APIs that accept functional interfaces, making them more versatile.
Easier Maintenance: Code that uses lambda expressions is often easier to maintain because it’s more self-contained and less prone to bugs introduced by accidental changes to shared state.
Compatibility: Lambda expressions are backward-compatible, meaning you can use them in Java 8 and later versions without any issues. This makes it possible to gradually adopt newer language features while maintaining compatibility with older code.
Reduced Anonymity: Lambda expressions provide a name (though not explicit) to otherwise anonymous functions, making it easier to identify and debug issues in stack traces and logs.
Improved Performance: In some cases, lambda expressions can lead to improved performance. The JVM can optimize certain operations performed with lambda expressions more effectively than equivalent code written with anonymous inner classes.
Overall, lambda expressions are a valuable addition to Java, enabling more modern and expressive coding styles while maintaining compatibility with older Java code. They encourage best practices, such as code reusability, readability, and functional programming, ultimately leading to more maintainable and efficient applications.
Section 7: Common Use Cases
Lambda expressions in Java are a versatile tool that can be used in a wide range of scenarios to make your code more concise and expressive. Here are some common use cases where you can benefit from using lambda expressions:
Collections and Streams: Lambda expressions are often used with the Java Collections API and Streams API for tasks like filtering, mapping, and reducing elements in a collection.
Sorting: You can use lambda expressions to specify custom sorting criteria for collections.
Event Handling: Lambda expressions are useful when defining event handlers for GUI components or other event-driven programming scenarios.
Concurrency: Lambda expressions can be employed when working with the java.util.concurrent package to define tasks for execution in threads or thread pools.
Functional Interfaces: Implementing and using functional interfaces is a primary use case for lambdas. You can define custom functional interfaces to model specific behaviors and then use lambda expressions to provide implementations.
Optional: Lambda expressions can be used with Java’s Optional class to define actions that should occur if a value is present or not present.
Functional Programming: Lambda expressions enable functional programming techniques in Java, allowing you to write code that treats functions as first-class citizens. This includes passing functions as arguments, returning functions from other functions, and more.
Custom Iteration: When iterating over custom data structures or performing complex iterations, lambda expressions can simplify the code.
Resource Management: In cases where resources need to be managed explicitly, such as opening and closing files or database connections, lambda expressions can be used to define actions to be taken during resource initialization and cleanup.
Dependency Injection: Lambda expressions can be used in dependency injection frameworks to provide implementations of functional interfaces or to specify custom behaviors for components.
Section 8: Best Practices for Using Lambda Expressions
Using lambda expressions effectively in Java can lead to more readable and maintainable code. To ensure you’re following best practices when working with lambda expressions, consider the following guidelines:
Use Lambda Expressions with Functional Interfaces: Lambda expressions are most powerful when used with functional interfaces. Ensure that the interface you are working with has only one abstract method. If it has more than one, the lambda expression won’t be able to determine which method to implement.
Choose Descriptive Parameter Names: Use meaningful parameter names in your lambda expressions. Descriptive names make the code more readable and help others understand the purpose of the lambda.
(x, y) -> x + y // Less readable
(value1, value2) -> value1 + value2 // More readable
Keep Lambda Expressions Short and Focused: Lambda expressions should be concise and focused on a single task. If a lambda becomes too complex, it may be a sign that it should be refactored into a separate method or function.
Use Method References When Appropriate: If your lambda expression simply calls an existing method, consider using method references for cleaner and more concise code. Method references are often more readable, especially for common operations like System.out::println.
list.forEach(System.out::println);
Explicitly Specify Types When Necessary: While Java can often infer types, explicitly specifying types in your lambda expressions can make the code more readable and less error-prone, especially in complex scenarios.
(String s) -> s.length() // Explicit type s -> s.length() // Inferred type
Use Parentheses for Clarity: When your lambda expression has multiple parameters or a complex body, use parentheses to make it clearer.
(a, b) -> a + b // Clearer
a, b -> a + b // Less clear
Avoid Side Effects: Lambda expressions should ideally be stateless and avoid modifying external variables (unless they are effectively final). Avoid side effects that can make code harder to reason about and test.
Exception Handling: Be cautious with exception handling within lambda expressions. Consider wrapping lambda bodies with try-catch blocks when necessary. If exceptions occur, they may be wrapped in UncheckedIOException or UncheckedExecutionException.
Think About Parallelism: When using lambda expressions with the Streams API, think about the potential for parallelism. Ensure that your lambda expressions don’t have any side effects that could cause issues when used in parallel streams.
Testing: When writing unit tests, use lambda expressions to define behavior that can be easily tested. Lambda expressions make it straightforward to pass mock implementations or behavior to test components.
Documentation: Document the intent and purpose of your lambda expressions, especially if they perform complex operations or are part of a public API. Clear documentation helps other developers understand how to use your code effectively.
Code Reviews: As with any code, it’s essential to conduct code reviews when using lambda expressions, especially in team environments. Reviews can help catch issues related to readability, maintainability, and adherence to best practices.
Code Style: Follow your team’s or organization’s coding style guidelines when using lambda expressions. Consistency in coding style helps maintain code readability and understandability.
Profile for Performance: While lambda expressions are generally efficient, it’s a good practice to profile your code to identify any performance bottlenecks, especially when using them in critical sections of your application.
By following these best practices, you can make the most of lambda expressions in Java and ensure that your code remains clean, readable, and maintainable. Lambda expressions are a powerful tool when used appropriately, and they can lead to more expressive and efficient code.
Section 9: Conclusion
Remember that lambda expressions are most beneficial when used with functional interfaces, which have a single abstract method. These interfaces are designed to work seamlessly with lambda expressions and provide a clear and concise way to define behavior. Additionally, lambda expressions encourage a more functional and declarative style of programming, which can lead to cleaner and more maintainable code.
Java 17 was released on September 14, 2021, and it includes several new features and improvements that developers can use to build better and more efficient applications. In this tutorial, we’ll take a closer look at some of the most important features of Java 17 and how to use them in your projects.
In this tutorial, we’ll cover the following features:
Sealed Classes and Interfaces
Pattern Matching for instanceof
Records
Text Blocks
Switch Expressions
Helpful NullPointerExceptions
Foreign-Memory Access API (Incubator)
Vector API (Incubator)
Enhanced Pseudo-Random Number Generators
Enhanced NUMA-Aware Memory Allocation for G1
1. Sealed Classes and Interfaces:
Sealed Classes and Interfaces, a new language feature that allows developers to restrict the inheritance hierarchy of a class or interface. Sealed classes and interfaces provide greater control over how classes and interfaces can be extended, improving the design of object-oriented systems and making them more secure and maintainable.
Sealed classes and interfaces are defined using the sealed keyword, which restricts the set of classes or interfaces that can extend or implement the sealed class or interface. This restricts the inheritance hierarchy, preventing unauthorized subclasses or interfaces from being created.
The syntax for defining a sealed class or interface is as follows:
public sealed class MyClass permits SubClass1, SubClass2, ... {
    // class definition
}
In this example, the sealed keyword is used to define the class MyClass as a sealed class, and the permits keyword is used to list the permitted subclasses SubClass1, SubClass2, and so on. This restricts the set of classes that can extend MyClass to the specified subclasses.
The same syntax applies to sealed interfaces, as shown in the following example:
In this example, the sealed keyword is used to define the interface MyInterface as a sealed interface, and the permits keyword is used to list the permitted subinterfaces SubInterface1, SubInterface2, and so on. This restricts the set of interfaces that can extend MyInterface to the specified subinterfaces.
Sealed classes and interfaces provide several benefits, including:
Improved design: Sealed classes and interfaces provide greater control over the inheritance hierarchy, improving the overall design of the system and making it easier to reason about.
Security: Sealed classes and interfaces prevent unauthorized subclasses or interfaces from being created, reducing the risk of security vulnerabilities.
Maintainability: Sealed classes and interfaces make it easier to maintain the system over time, as changes to the inheritance hierarchy can be made more safely and with greater confidence.
In summary, sealed classes and interfaces are a new language feature in Java 17 that allow developers to restrict the inheritance hierarchy of a class or interface. By providing greater control over the inheritance hierarchy, sealed classes and interfaces improve the design of object-oriented systems and make them more secure and maintainable.
2. Pattern Matching for instanceof
Pattern matching for instanceof is a new language feature in Java 17 that allows developers to write more concise and expressive code when checking the type of an object. With pattern matching for instanceof, developers can combine a type check with a type cast into a single expression, making the code more readable and less error-prone.
Prior to Java 17, developers would typically use an if statement to check the type of an object and then cast it to the appropriate type. For example:
if (myObject instanceof MyClass) {
    MyClass myClass = (MyClass) myObject;
    // use myClass
}
With pattern matching for instanceof, the above code can be simplified into a single expression:
if (myObject instanceof MyClass myClass) {<br>// use myClass<br>}
In this example, the type check and the cast are combined into a single expression. If myObject is an instance of MyClass, it will be cast to MyClass and assigned to the new variable myClass, which can be used within the if block.
Pattern matching for instanceof also supports the use of the else keyword to specify a default branch, as shown in the following example:
if (myObject instanceof MyClass myClass) {
    // use myClass
} else {
    // handle other types
}
In this example, if myObject is not an instance of MyClass, the code in the else block will be executed instead.
Pattern matching for instanceof provides several benefits, including:
Concise and expressive code: Pattern matching for instanceof allows developers to write more concise and expressive code, making it easier to read and understand.
Fewer errors: By combining the type check and the cast into a single expression, pattern matching for instanceof reduces the risk of errors that can arise from separate type checks and casts.
Improved performance: Pattern matching for instanceof can improve performance by reducing the number of unnecessary casts.
In summary, pattern matching for instanceof is a new language feature in Java 17 that allows developers to write more concise and expressive code when checking the type of an object. By combining the type check and the cast into a single expression, pattern matching for instanceof reduces the risk of errors and improves performance.
3. Records
Records is a new feature introduced in Java 16 and finalized in Java 17 that provides a concise and immutable way to declare classes whose main purpose is to hold data. Records are essentially classes that are designed to store data rather than represent objects with behavior.
In Java, classes are typically created to represent objects that have both data and behavior. However, sometimes we need to create classes that are only used to hold data without any additional behavior. In such cases, creating a traditional class with fields, getters, setters, equals, hashCode, and toString methods can be quite verbose and repetitive.
With records, the syntax is much simpler and more concise. A record is defined using the record keyword, followed by the class name, and then a list of properties within parentheses. Here’s an example of a record definition:
public record Person(String name, int age) {}
In this example, we’ve created a record called Person with two properties: name of type String and age of type int. Note that we didn’t need to explicitly declare constructors, getters, setters, or other methods, because they are automatically generated by the compiler.
With records, you can also add additional methods, such as custom constructors or instance methods. Here’s an example:
public record Person(String name, int age) {
    public Person {
        if (age < 0) {
            throw new IllegalArgumentException("Age cannot be negative");
        }
    }

    public String getName() {
        return name.toUpperCase();
    }
}
In this example, we’ve added a custom constructor that checks if the age is negative, and an instance method that returns the uppercase name.
Records also provide a compact and readable way to override the default equals, hashCode, and toString methods. For example, the following record definition:
public record Person(String name, int age) {
    @Override
    public String toString() {
        return name + " (" + age + ")";
    }
}
overrides the default toString method to return a string representation of the Person record.
In summary, records are a new feature in Java 16/17 that provide a concise and immutable way to declare classes whose main purpose is to hold data. They simplify the creation of classes that are only used to hold data without any additional behavior, and provide automatic generation of constructors, getters, setters, equals, hashCode, and toString methods. With records, you can also add additional methods and override default methods in a compact and readable way.
4. Text Blocks
Text blocks provide a more readable way to declare multi-line strings in Java 17. Text blocks can contain line breaks and other whitespace characters without requiring special escape sequences.
In this example, the html string contains an HTML document declared using a text block. The text block starts with """ and ends with """, and the document is indented for readability.
Here’s an example that demonstrates how to use placeholders and expressions inside text blocks:
String name = "Alice";
int age = 30;
String message = """
                 Hello, ${name}!

                 You are ${age} years old.

                 Your age in dog years is ${age * 7}.
                 """;
System.out.println(message);
In this example, we define two variables (name and age) and use them inside a text block to create a message. The ${expression} syntax is used to include the values of the variables inside the message, and we also include an expression (age * 7) to calculate the age in dog years.
Text blocks can also be used with other features in Java, such as switch expressions and lambda expressions. For example, you can use a text block inside a switch expression to define a case label:
String day = "Monday";
String message = switch (day) {
    case "Monday", "Tuesday", "Wednesday", "Thursday", "Friday" -> """
                                                                   It's a weekday.

                                                                   Time to go to work.
                                                                   """;
    case "Saturday", "Sunday" -> """
                                 It's the weekend.

                                 Time to relax and have fun!
                                 """;
    default -> """
               Invalid day.

               Please enter a valid day of the week.
               """;
};
System.out.println(message);
In this example, we use a text block to define the message for each case label in the switch expression. This makes the code easier to read and maintain, and reduces the amount of boilerplate code that is required.
Overall, text blocks are a useful feature that can make Java code more concise and readable, especially in cases where you need to write multiline strings or include formatting whitespace.
5. Switch Expressions
Switch expressions are a new feature introduced in Java 17 that provide a more concise and expressive syntax for switch statements. Switch statements are commonly used in Java to evaluate a single value and perform different actions based on different cases. Prior to Java 17, switch statements could only be used to execute a block of code, but with switch expressions, you can now assign the result of the switch statement to a variable.
The syntax for switch expressions is similar to the syntax for switch statements, with a few differences. In switch expressions, the cases are defined using the -> operator instead of the : operator, and the switch expression returns a value instead of executing a block of code.
Here’s an example that demonstrates how to use switch expressions in Java 17:
String day = "Monday";
String result = switch (day) {
    case "Monday", "Tuesday", "Wednesday", "Thursday", "Friday" -> "Weekday";
    case "Saturday", "Sunday" -> "Weekend";
    default -> "Invalid day";
};
System.out.println(result); // Output: Weekday
In this example, we first define a string variable day with the value “Monday”. We then use a switch expression to evaluate the value of day and assign the result to a string variable called result. The switch expression has two cases: one for weekdays and one for weekends. If the value of day matches one of the weekdays, the switch expression will return the string “Weekday”, and if it matches one of the weekends, it will return the string “Weekend”. If day does not match any of the defined cases, the switch expression will return the string “Invalid day”.
One of the benefits of switch expressions is that they can make code more concise and easier to read. They can also reduce the amount of code you need to write in some cases. For example, consider the following code snippet that uses a switch statement to perform an action based on the value of a variable:
int value = 10;
switch (value) {
    case 1:
        System.out.println("One");
        break;
    case 2:
        System.out.println("Two");
        break;
    case 3:
        System.out.println("Three");
        break;
    default:
        System.out.println("Unknown");
        break;
}
With switch expressions, you can write the same code in a more concise way:
int value = 10;
String result = switch (value) {
    case 1 -> "One";
    case 2 -> "Two";
    case 3 -> "Three";
    default -> "Unknown";
};
System.out.println(result); // Output: Unknown
Switch expressions can be especially useful in situations where you need to perform a switch statement and assign the result to a variable, or when you need to perform complex operations based on the value of a variable.
6. Helpful NullPointerExceptions
Helpful NullPointerExceptions aims to provide more detailed information about null pointer exceptions (NPEs) at runtime. The goal of this feature is to make it easier for developers to identify the source of null pointer exceptions and fix them more quickly.
In previous versions of Java, when a null pointer exception occurred, the error message provided limited information about where the exception occurred and which variable was null. This made it difficult for developers to debug their code and find the root cause of the problem.
With the new Helpful NullPointerExceptions feature, the error message now includes additional details that can help developers identify the source of the problem. For example, the error message might now include information about the method or line number where the exception occurred, as well as the name of the variable that was null.
Here’s an example of how the error message for a null pointer exception might look with the Helpful NullPointerExceptions feature enabled:
Exception in thread "main" java.lang.NullPointerException: Cannot invoke "String.length()" because "s" is null
	at com.example.MyClass.myMethod(MyClass.java:10)
In this example, the error message includes the name of the method (myMethod) where the exception occurred, as well as the line number (10) and the name of the variable that was null (s).
To enable the Helpful NullPointerExceptions feature, you can use the -XX:+ShowCodeDetailsInExceptionMessages option when running your Java application. This option is only available in JDK 17 and later versions.
Overall, the Helpful NullPointerExceptions feature is a useful addition to Java that can make it easier for developers to debug their code and find and fix null pointer exceptions more quickly. By providing more detailed error messages, developers can spend less time searching for the source of the problem and more time fixing it.
7. Foreign-Memory Access API (Incubator)
Foreign-Memory Access API, which provides a way for Java developers to directly access and manipulate memory outside of the Java heap. This API is designed for use cases where high-performance access to memory is required, such as in graphics processing, machine learning, and database systems.
The Foreign-Memory Access API allows developers to create and manage direct buffers that are backed by native memory. These buffers can be used to read and write data directly to and from the memory, without going through the Java heap. This can significantly improve the performance of memory-intensive operations, as it avoids the overhead of copying data between the Java heap and native memory.
To use the Foreign-Memory Access API, you first need to create a memory segment that represents the native memory. This can be done using the MemorySegment class, which provides methods for allocating, deallocating, and accessing memory segments. Once you have a memory segment, you can create a direct buffer that is backed by the segment using the MemorySegment.asByteBuffer() method. This buffer can be used to read and write data to and from the memory segment, as you would with any other byte buffer.
Here’s an example of how to use the Foreign-Memory Access API to allocate a memory segment and create a direct buffer:
import jdk.incubator.foreign.*;
public class MemoryExample {
    public static void main(String[] args) {
        // Allocate a memory segment of 1024 bytes
        MemorySegment segment = MemorySegment.allocateNative(1024);
        // Create a direct buffer backed by the memory segment
        ByteBuffer buffer = segment.asByteBuffer();
        // Write some data to the buffer
        buffer.putInt(0, 123);
        buffer.putDouble(4, 3.14);
        // Read the data back from the buffer
        int i = buffer.getInt(0);
        double d = buffer.getDouble(4);
        // Print the values
        System.out.println("i = " + i);
        System.out.println("d = " + d);
        // Deallocate the memory segment
        segment.close();
    }
}
In this example, we first allocate a memory segment of 1024 bytes using the MemorySegment.allocateNative() method. We then create a direct buffer backed by the memory segment using the MemorySegment.asByteBuffer() method. We write some data to the buffer using the putInt() and putDouble() methods, and then read the data back using the getInt() and getDouble() methods. Finally, we deallocate the memory segment using the close() method.
Note that the Foreign-Memory Access API is an incubating feature in Java 17, which means that it is still under development and subject to change in future releases. It should only be used in production environments with caution and after thorough testing.
8. Vector API (Incubator)
Vector API provides a set of vectorized operations for working with SIMD (Single Instruction Multiple Data) instructions on modern CPU architectures. This API is designed for use cases where high-performance processing of large data sets is required, such as in scientific computing, machine learning, and graphics processing.
The Vector API allows developers to perform arithmetic and logical operations on vectors of data in a way that takes advantage of SIMD instructions, which can perform multiple calculations in parallel. This can significantly improve the performance of certain types of computations, as it reduces the number of instructions that need to be executed and maximizes the use of available CPU resources.
To use the Vector API, you first need to create a vector using one of the factory methods provided by the API. These factory methods create vectors of a specific type (such as IntVector or FloatVector) and with a specific size (such as 128 bits or 256 bits). Once you have a vector, you can perform various operations on it, such as addition, subtraction, multiplication, and comparison.
Here’s an example of how to use the Vector API to perform a vectorized addition operation:
In this example, we first create two vectors of four floats each using the FloatVector.fromArray() method. We then add the two vectors together using the add() method and store the result in a third vector. Finally, we print the result.
import jdk.incubator.vector.*;
public class VectorExample {
    public static void main(String[] args) {
        // Create two vectors of four floats each
        FloatVector a = FloatVector.fromArray(VectorSpecies_128.F_128, new float[]{1, 2, 3, 4});
        FloatVector b = FloatVector.fromArray(VectorSpecies_128.F_128, new float[]{5, 6, 7, 8});
        // Add the two vectors together
        FloatVector c = a.add(b);
        // Print the result
        System.out.println("c = " + c);
    }
}
Note that the Vector API is an incubating feature in Java 17, which means that it is still under development and subject to change in future releases. It should only be used in production environments with caution and after thorough testing. Additionally, the Vector API requires hardware support for SIMD instructions, which may not be available on all systems.
9. Enhanced Pseudo-Random Number Generators
Java 17 introduces enhancements to the existing Pseudo-Random Number Generators (PRNG) in the java.util.random package. These enhancements provide developers with more flexibility and control over the generation of random numbers, as well as improved security.
The enhancements include three new algorithms, new methods for generating random bytes and random integers, and improvements to the existing SplittableRandom class.
New PRNG Algorithms
Java 17 introduces three new PRNG algorithms:
LXM
PCG64
Xoshiro
These algorithms provide different trade-offs between performance and randomness, and allow developers to choose the one that best fits their specific use case.
New Methods for Generating Random Bytes and Integers
Java 17 also introduces new methods in the java.util.random package for generating random bytes and random integers. These methods include:
RandomGenerator.nextInt(int bound) and RandomGenerator.nextLong(long bound): These methods generate random integers and longs respectively within the specified range.
RandomGenerator.nextBytes(byte[] bytes): This method generates random bytes and fills them into the specified array.
These new methods provide more convenience and flexibility to developers, making it easier to generate random numbers with specific characteristics.
Improvements to SplittableRandom
Java 17 also introduces improvements to the SplittableRandom class, which provides a way to generate repeatable sequences of random numbers. The improvements include:
A new split() method that returns a new instance of the SplittableRandom class with a different seed, allowing for the generation of independent sequences of random numbers.
Improved performance for generating large numbers of random numbers in parallel.
These improvements make the SplittableRandom class more useful for applications that require large amounts of random data, such as Monte Carlo simulations and statistical analysis.
The enhancements to the Pseudo-Random Number Generators in Java 17 provide developers with more flexibility and control over the generation of random numbers, as well as improved security. With the introduction of new algorithms and methods, and improvements to the SplittableRandom class, Java 17 makes it easier to generate random numbers with specific characteristics, and to generate large amounts of random data efficiently.
10. Enhanced NUMA-Aware Memory Allocation for G1
Java 17 introduces an enhancement to the Garbage-First Garbage Collector (G1) that improves its ability to allocate memory in a Non-Uniform Memory Access (NUMA) architecture. This enhancement is designed to improve the performance of applications running on NUMA systems, which are increasingly common in modern high-performance computing environments.
In NUMA architectures, memory is distributed across multiple nodes, each with its own local memory and access latency. Applications running on these systems can experience performance degradation if memory allocation is not optimized to take into account the NUMA topology.
The enhanced NUMA-aware memory allocation in G1 improves performance by allocating memory in a way that takes into account the NUMA topology of the system. Specifically, it attempts to allocate memory on the local node whenever possible, reducing the need for remote memory accesses that can result in increased latency and reduced performance.
The enhanced allocation strategy works by first identifying the NUMA topology of the system and then using that information to allocate memory in a way that maximizes locality. The strategy also takes into account the current state of the system, such as the availability of free memory and the current load on each node, to ensure that allocations are made in an efficient and effective manner.
To enable NUMA-aware memory allocation in G1, developers can set the -XX:+UseNUMA flag when running their application. This flag tells the JVM to use the enhanced allocation strategy, which can result in improved performance on NUMA architectures.
In addition to the -XX:+UseNUMA flag, developers can also use the -XX:NumAProximityPolicy flag to control the proximity policy used by G1 when allocating memory. The default policy is compact, which attempts to allocate memory on the closest node first. Other policies, such as scatter and balance, are also available, allowing developers to fine-tune the allocation strategy to meet the specific needs of their application.
In summary, the enhanced NUMA-aware memory allocation in G1 in Java 17 provides a valuable tool for developers working with applications running on NUMA architectures. By taking into account the NUMA topology of the system, G1 can allocate memory in a way that maximizes locality and minimizes remote memory accesses, resulting in improved performance and reduced latency.
This program defines an Employee class with properties of name, id, and age, and implements the Comparable interface to enable sorting by age. The main method creates a list of 100 employee objects and sorts them based on age using the Collections.sort method. Finally, the sorted list of employees is printed to the console.
import java.util.ArrayList;
import java.util.Collections;
import java.util.Comparator;
import java.util.List;

public class Employee implements Comparable<Employee> {
    private String name;
    private String id;
    private int age;

    public Employee(String name, String id, int age) {
        this.name = name;
        this.id = id;
        this.age = age;
    }

    public String getName() {
        return name;
    }

    public String getId() {
        return id;
    }

    public int getAge() {
        return age;
    }

    @Override
    public int compareTo(Employee other) {
        return Integer.compare(this.age, other.age);
    }

    @Override
    public String toString() {
        return "Employee{" +
                "name='" + name + '\'' +
                ", id='" + id + '\'' +
                ", age=" + age +
                '}';
    }

    public static void main(String[] args) {
        // Create a list of 100 employee objects
        List<Employee> employees = new ArrayList<>();
        employees.add(new Employee("John", "1001", 25));
        employees.add(new Employee("Jane", "1002", 30));
        employees.add(new Employee("Bob", "1003", 28));
        // ... and so on for the other 97 employees

        // Sort the list of employees based on age (ascending order)
        Collections.sort(employees);
        System.out.println(employees);
    }
}
Apache Kakfa is an opensourcedistributedevent streaming platform which works based on publish/subscribe messaging system. That means, there would be a producer who publishes messages to Kafka and a consumer who reads messages from Kafka. In between, Kafka acts like a filesystem or database commit log.
In this article we will discuss about writing a Kafka producer and consumer using Java with customized serialization and deserializations.
Kakfa Producer Application:
Producer is the one who publish the messages to Kafka topic. Topic is a partitioner in Kafka environment, it is very similar to a folder in a file system. In the below example program, messages are getting published to Kafka topic ‘kafka-message-count-topic‘.
package com.malliktalksjava.kafka.producer;

import java.util.Properties;
import java.util.concurrent.ExecutionException;

import com.malliktalksjava.kafka.constants.KafkaConstants;
import com.malliktalksjava.kafka.util.CustomPartitioner;
import org.apache.kafka.clients.producer.*;
import org.apache.kafka.common.serialization.LongSerializer;
import org.apache.kafka.common.serialization.StringSerializer;
import org.slf4j.Logger;
import org.slf4j.LoggerFactory;

public class KafkaSampleProducer {

    static Logger log = LoggerFactory.getLogger(KafkaSampleProducer.class);

    public static void main(String[] args) {
        runProducer();
    }

    static void runProducer() {
        Producer<Long, String> producer = createProducer();

        for (int index = 0; index < KafkaConstants.MESSAGE_COUNT; index++) {
            ProducerRecord<Long, String> record = new ProducerRecord<Long, String>(KafkaConstants.TOPIC_NAME,
                    "This is record " + index);
            try {
                RecordMetadata metadata = producer.send(record).get();
                //log.info("Record sent with key " + index + " to partition " + metadata.partition() +
                 //       " with offset " + metadata.offset());
                System.out.println("Record sent with key " + index + " to partition " + metadata.partition() +
                        " with offset " + metadata.offset());
            } catch (ExecutionException e) {
                log.error("Error in sending record", e);
                e.printStackTrace();
            } catch (InterruptedException e) {
                log.error("Error in sending record", e);
                e.printStackTrace();
            }
        }
    }

    public static Producer<Long, String> createProducer() {
        Properties props = new Properties();
        props.put(ProducerConfig.BOOTSTRAP_SERVERS_CONFIG, KafkaConstants.KAFKA_BROKERS);
        props.put(ProducerConfig.CLIENT_ID_CONFIG, KafkaConstants.CLIENT_ID);
        props.put(ProducerConfig.KEY_SERIALIZER_CLASS_CONFIG, LongSerializer.class.getName());
        props.put(ProducerConfig.VALUE_SERIALIZER_CLASS_CONFIG, StringSerializer.class.getName());
        props.put(ProducerConfig.PARTITIONER_CLASS_CONFIG, CustomPartitioner.class.getName());
        return new KafkaProducer<>(props);
    }
}
Kakfa Consumer Program:
Consumer is the one who subscribe to Kafka topic to read the messages. There are different ways to read the messages from Kafka, below example polls the topic for every thousend milli seconds to fetch the messages from Kafka.
package com.malliktalksjava.kafka.consumer;

import java.util.Collections;
import java.util.Properties;

import com.malliktalksjava.kafka.constants.KafkaConstants;
import com.malliktalksjava.kafka.producer.KafkaSampleProducer;
import org.apache.kafka.clients.consumer.Consumer;
import org.apache.kafka.clients.consumer.ConsumerConfig;
import org.apache.kafka.clients.consumer.KafkaConsumer;
import org.apache.kafka.common.serialization.LongDeserializer;
import org.apache.kafka.common.serialization.StringDeserializer;

import org.apache.kafka.clients.consumer.ConsumerRecords;
import org.slf4j.Logger;
import org.slf4j.LoggerFactory;

public class KafkaSampleConsumer {
    static Logger log = LoggerFactory.getLogger(KafkaSampleProducer.class);

    public static void main(String[] args) {
        runConsumer();
    }

    static void runConsumer() {
        Consumer<Long, String> consumer = createConsumer();
        int noMessageFound = 0;
        while (true) {
            ConsumerRecords<Long, String> consumerRecords = consumer.poll(1000);
            // 1000 is the time in milliseconds consumer will wait if no record is found at broker.
            if (consumerRecords.count() == 0) {
                noMessageFound++;
                if (noMessageFound > KafkaConstants.MAX_NO_MESSAGE_FOUND_COUNT)
                    // If no message found count is reached to threshold exit loop.
                    break;
                else
                    continue;
            }

            //print each record.
            consumerRecords.forEach(record -> {
                System.out.println("Record Key " + record.key());
                System.out.println("Record value " + record.value());
                System.out.println("Record partition " + record.partition());
                System.out.println("Record offset " + record.offset());
            });

            // commits the offset of record to broker.
            consumer.commitAsync();
        }
        consumer.close();
    }

        public static Consumer<Long, String> createConsumer() {
            Properties props = new Properties();
            props.put(ConsumerConfig.BOOTSTRAP_SERVERS_CONFIG, KafkaConstants.KAFKA_BROKERS);
            props.put(ConsumerConfig.GROUP_ID_CONFIG, KafkaConstants.GROUP_ID_CONFIG);
            props.put(ConsumerConfig.KEY_DESERIALIZER_CLASS_CONFIG, LongDeserializer.class.getName());
            props.put(ConsumerConfig.VALUE_DESERIALIZER_CLASS_CONFIG, StringDeserializer.class.getName());
            props.put(ConsumerConfig.MAX_POLL_RECORDS_CONFIG, KafkaConstants.MAX_POLL_RECORDS);
            props.put(ConsumerConfig.ENABLE_AUTO_COMMIT_CONFIG, "false");
            props.put(ConsumerConfig.AUTO_OFFSET_RESET_CONFIG, KafkaConstants.OFFSET_RESET_EARLIER);

            Consumer<Long, String> consumer = new KafkaConsumer<>(props);
            consumer.subscribe(Collections.singletonList(KafkaConstants.TOPIC_NAME));
            return consumer;
        }
}
Messages will be published to a Kafka partition called Topic. A Kafka topic is sub-divided into units called partitions for fault tolerance and scalability.
Every Record in Kafka has key value pairs, while publishing messages key is optional. If you don’t pass the key, Kafka will assign its own key for each message. In Above example, ProducerRecord<Integer, String> is the message that published to Kafka has Integer type as key and String as value.
Message Model Class: Below model class is used to publish the object. Refer to below descriptions on how this class being used in the application.
package com.malliktalksjava.kafka.model;

import java.io.Serializable;

public class Message implements Serializable{

    private static final long serialVersionUID = 1L;

    private String id;
    private String name;

    public String getId() {
        return id;
    }

    public void setId(String id) {
        this.id = id;
    }

    public String getName() {
        return name;
    }

    public void setName(String name) {
        this.name = name;
    }
}
Constants class: All the constants related to this application have been placed into below class.
package com.malliktalksjava.kafka.constants;

public class KafkaConstants {

    public static String KAFKA_BROKERS = "localhost:9092";

    public static Integer MESSAGE_COUNT=100;

    public static String CLIENT_ID="client1";

    public static String TOPIC_NAME="kafka-message-count-topic";

    public static String GROUP_ID_CONFIG="consumerGroup1";

    public static String GROUP_ID_CONFIG_2 ="consumerGroup2";

    public static Integer MAX_NO_MESSAGE_FOUND_COUNT=100;

    public static String OFFSET_RESET_LATEST="latest";

    public static String OFFSET_RESET_EARLIER="earliest";

    public static Integer MAX_POLL_RECORDS=1;
}
Custom Serializer: Serializer is the class which converts java objects to write into disk. Below custom serializer is converting the Message object to JSON String. Serialized message will be placed into Kafka Topic, this message can’t be read until it is deserialized by the consumer.
package com.malliktalksjava.kafka.util;

import java.util.Map;
import com.malliktalksjava.kafka.model.Message;
import org.apache.kafka.common.serialization.Serializer;
import com.fasterxml.jackson.databind.ObjectMapper;

public class CustomSerializer implements Serializer<Message> {

    @Override
    public void configure(Map<String, ?> configs, boolean isKey) {

    }

    @Override
    public byte[] serialize(String topic, Message data) {
        byte[] retVal = null;
        ObjectMapper objectMapper = new ObjectMapper();
        try {
            retVal = objectMapper.writeValueAsString(data).getBytes();
        } catch (Exception exception) {
            System.out.println("Error in serializing object"+ data);
        }
        return retVal;
    }
    @Override
    public void close() {

    }
}
Custom Deserializer: Below custom deserializer, converts the serealized object coming from Kafka into Java object.
Custom Partitioner: If you would like to do any custom settings for Kafka, you can do that using the java code. Below is the sample custom partitioner created as part of this applicaiton.
package com.malliktalksjava.kafka.util;

import org.apache.kafka.clients.producer.Partitioner;
import org.apache.kafka.common.Cluster;
import java.util.Map;

public class CustomPartitioner implements Partitioner{

    private static final int PARTITION_COUNT=50;

    @Override
    public void configure(Map<String, ?> configs) {

    }

    @Override
    public int partition(String topic, Object key, byte[] keyBytes, Object value, byte[] valueBytes, Cluster cluster) {
        Integer keyInt=Integer.parseInt(key.toString());
        return keyInt % PARTITION_COUNT;
    }

    @Override
    public void close() {
    }
}
Apache Kakfa is an opensourcedistributedevent streaming platform which works based on publish/subscribe messaging system. That means, there would be a producer who publishes messages to Kafka and a consumer who reads messages from Kafka. In between, Kafka acts like a filesystem or database commit log.
In this post we will setup kafka local environment, create topic, publish and consume messages using console clients.
Extract the folder into your local and navigate to the folder in Terminal session (if Mac) or command line (if windows):
$ tar -xzf kafka_2.13-3.1.0.tgz
$ cd kafka_2.13-3.1.0
Step 2: Run Kafka in your local:
Run zookeeper using the below command terminal/command line window 1:
# Start the ZooKeeper service
$ bin/zookeeper-server-start.sh config/zookeeper.properties
Run Kafka using the below command in another terminal or command line:
# Start the Kafka broker service
$ bin/kafka-server-start.sh config/server.properties
Note: You must have Java8 or above in your machine to run Kafka.
Once above two services are run successfully in local, you are set with running Kafka in your local machine.
Step 3: Create topic in Kafka to produce/consume the message in another terminal or command like. In below example, topic name is ‘order-details’ and kafka broker is running in my localhost 9092 port.
Run the console producer client to write a few events into your topic. By default, each line you enter will result in a separate event being written to the topic.
$ bin/kafka-console-producer.sh --topic order-details --bootstrap-server localhost:9092
Order 1 details
Order 2 details
Step 5: Read events from Kafka
Open another terminal session/command line and run the console consumer client to read the events you just created:
$ bin/kafka-console-consumer.sh --topic order-details --from-beginning --bootstrap-server localhost:9092
Order 1 details
Order 2 details
Conclusion:
By completing all the above steps, you learned about setting up kafka environment, creating topics, producing the messages using console producer and consming the message using console consumer.
In standard applications, app logs are implemented into a single file which can be read for debugging purposes. However, apps which follows microservices architecture style comprises multiple small apps and multiple log files are to maintained to have at least one file per microservice. Due to this , identification and correlation of logs to a specific request chain becomes difficult.
For this, distributed logging & tracing mechanism can be implemented using tools like Sleuth, Zipkin, ELK etc
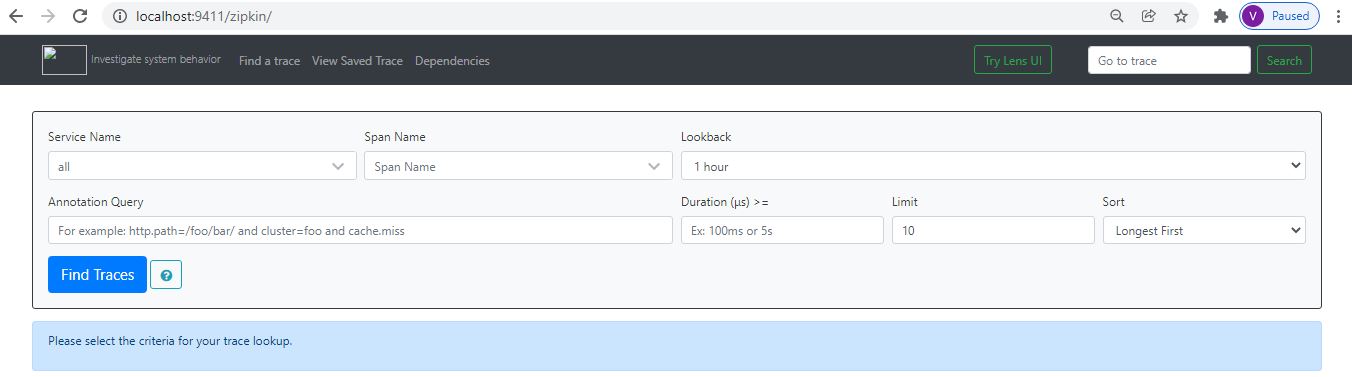
How to use Sleuth?
Sleuth is part of spring cloud libraries. It can be used to generate the traceid, spanid and add this information to the service calls in headers and mapped diagnostic context (MDC). These ids can be used by the tools such as Zipkin, ELK to store, index and process the log file.
To use sleuth in the app, following dependencies needs to be added
To see distributed logging implementation, we need to create three services with the same configuration, the only difference has to be the service invocation details where the endpoint changes.
Create services as Spring boot applications with Web, Rest Repository, Zipkin and Sleuth dependencies.
Package services inside a single parent project so that three services can be built together. Also, I’ve added useful windows scripts in github repo to start/stop all the services with a single command
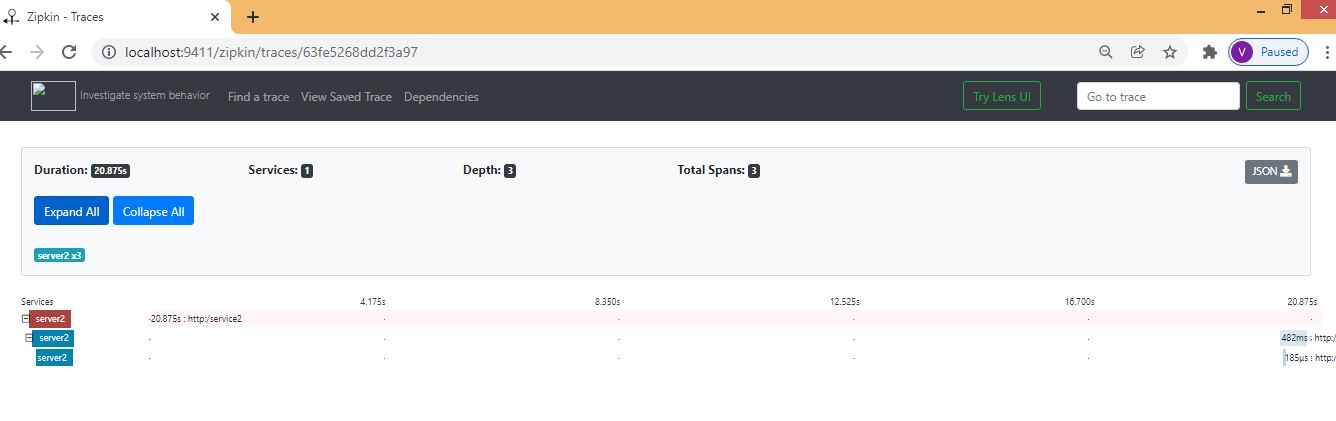
Below is one rest controller in service1 which exposes one endpoint and also invokes one downstream service using the RestTemplate. Also, we are using Sampler.ALWAYS_SAMPLE that traces each action.
Service 1
package com.mvtechbytes.service1;

import brave.sampler.Sampler;
import org.apache.log4j.Logger;
import org.springframework.beans.factory.annotation.Autowired;
import org.springframework.boot.SpringApplication;
import org.springframework.boot.autoconfigure.SpringBootApplication;
import org.springframework.context.annotation.Bean;
import org.springframework.core.ParameterizedTypeReference;
import org.springframework.http.HttpMethod;
import org.springframework.web.bind.annotation.GetMapping;
import org.springframework.web.bind.annotation.RestController;
import org.springframework.web.client.RestTemplate;

@SpringBootApplication
public class Service1Application {

    public static void main(String[] args) {
        SpringApplication.run(Service1Application.class, args);
    }
}

@RestController
class Service1Controller {

    private static final Logger LOG = Logger.getLogger(Service1Controller.class.getName());

    @Autowired
    RestTemplate restTemplate;

    @Bean
    public RestTemplate getRestTemplate() {
        return new RestTemplate();
    }

    @Bean
    public Sampler alwaysSampler() {
        return Sampler.ALWAYS_SAMPLE;
    }

    @GetMapping(value="/service1")
    public String service1()
    {
        LOG.info("Inside Service 1..");
String response = (String)   restTemplate.exchange("http://localhost:8082/service2", HttpMethod.GET, null, new ParameterizedTypeReference<String>() {}).getBody();
        return response;
    }
}
Appication Configuration
As all services will run in a single machine, so we need to run them in different ports. Also to identify in Zipkin, we need to give proper names. so configure the application name and port information in application.properties file under the resources folder.
There are many ways to sort a java object but it is very hard to figure out which one is more efficient. Here is an example which describes different ways of executing sorting mechanism for User object based on age.
Try to run this application in you local machine to see which method is more efficient and good to use in our regular programming life.
package com.malliktalksjava.java8;

import java.util.ArrayList;
import java.util.Collections;
import java.util.Comparator;
import java.util.List;

import static java.util.stream.Collectors.toList;

public class SortingExampleUser {

    public static void main(String[] args) {
        List<User> userList = new ArrayList<>();
        userList.add(new User("Ram", 28));
        userList.add(new User("Raj", 35));
        userList.add(new User("Rakesh", 31));
        userList.add(new User("Peter", 30));
        userList.add(new User("John", 25));
        userList.add(new User("Sri", 55));

        long starttime = System.currentTimeMillis();
        System.out.println("sortListUsingCollections : " + sortListUsingCollections(userList));
        System.out.println("Time Taken in Millis : " + (System.currentTimeMillis() - starttime));

        long starttime2 = System.currentTimeMillis();
        System.out.println("sortListUsingCollections : " + sortListUsingStreams(userList));
        System.out.println("Time Taken in Millis  2: " + (System.currentTimeMillis() - starttime2));

        long starttime3 = System.currentTimeMillis();
        System.out.println("sortListUsingCollections : " + sortUsingLambda(userList));
        System.out.println("Time Taken in Millis  2: " + (System.currentTimeMillis() - starttime3));


    }


    //using Collections.sort
    private static List<User> sortListUsingCollections(List<User> list){

        Collections.sort(list, Comparator.comparingInt(User::getAge));
        //Collections.reverse(list); // un comment if for descending order

        return list;
    }

    //using streams and comparator
    private static List<User> sortListUsingStreams(List<User> list){

        return list.stream()
                .sorted(Comparator.comparingInt(User::getAge))
                //.sorted(Comparator.comparingInt(User::getAge).reversed()) //-- for reverse order uncomment this line and comment above line
                .collect(toList());
    }

    //using lambda expressions
    private static List<User> sortUsingLambda(List<User> list){

        return list.stream()
                .sorted((User user1, User user2) -> user1.getAge() > user2.getAge() ? 1: 0)
                //.sorted((User user1, User user2) -> user1.getAge() < user2.getAge() ? 1: 0) - uncomment if reverse order needed
                .collect(toList());

    }
}

class User{
    private String name;
    private int age;

    public User(String name, int age) {
        this.name = name;
        this.age = age;
    }

    public String getName() {
        return name;
    }

    public void setName(String name) {
        this.name = name;
    }

    public int getAge() {
        return age;
    }

    public void setAge(int age) {
        this.age = age;
    }

    @Override
    public String toString() {
        return "User{" +
                "name='" + name + '\'' +
                ", age=" + age +
                '}';
    }
}
To Search a word in in list of files available in Folder, you need to find the list of files first and then scan each and every for required word. Below is the sample program to find the a given word Java in D:\\test folder of files.
package in.javatutorials;

import java.io.File;
import java.io.FileNotFoundException;
import java.util.Scanner;
import java.util.regex.MatchResult;

/**
 * Search for the files in a folder and prints all file details.
 */
public class WordCrawlerInFolder {

private static String directoryPath = "D://test";
private static String searchWord = "Java";

public WordCrawlerInFolder() {
super();
}

public static void main(String[] args) {
   WordCrawlerInFolder crawler = new WordCrawlerInFolder();
    File directory = new File(directoryPath);

    if (directory == null || !directory.exists()) {
           System.out.println("Directory doesn't exists!!!");
           return;
    }
    crawler.directoryCrawler(directory, searchWord);
}

/**
* Gets all the file and directories and prints accordingly
* @param directory
* Directory path where it should search
*/
public void directoryCrawler(File directory, String searchWord) {

// Get List of files in folder and print
File[] filesAndDirs = directory.listFiles();

// Print the root directory name
//System.out.println("-" + directory.getName());

// Iterate the list of files, if it is identified as not a file call
// directoryCrawler method to list all the files in that directory.
for (File file : filesAndDirs) {

if (file.isFile()) {
searchWord(file, searchWord);
//System.out.println(" |-" + file.getName());
} else {
directoryCrawler(file, searchWord);
}
}
}

/**
* Search for word in a given file.
* @param file
* @param searchWord
*/
private void searchWord(File file, String searchWord){
Scanner scanFile;
try {
scanFile = new Scanner(file);
while (null != scanFile.findWithinHorizon("(?i)\\b"+searchWord+"\\b", 0)) {
MatchResult mr = scanFile.match();
System.out.printf("Word found : %s at index %d to %d.%n", mr.group(),
mr.start(), mr.end());
}
scanFile.close();
} catch (FileNotFoundException e) {
System.err.println("Search File Not Found !!!!! ");
e.printStackTrace();
}
}
}
We have used some escape characters in above class searchWord() method, below is the notation for the same.
(?i) turn on the case-insensitive switch
\b means a word boundary
java is the string searched for
\b a word boundary again.
If search term contain special characters, it would be suggested to use \Q and \E around the string, as it quotes all characters in between. Make sure the input doesn’t contain \E itself.
Below Java Program lists the file names and directory names available in given folder. To do this implementation , we can get the files list in a folder using File class available in Java API. Iterate the files one by one and write the file name on to console.
If it is identified as a directory instead of a file, then iterate the process as mentioned in directoryCrawler() method in the below class.
package in.javatutorials;
import java.io.File;
/**
* @author malliktalksjava
*
* Search for the files in a folder and prints all file details.
*
*/
public class FolderCrawler {
private static String directoryPath = “D://test”;
/**
* Creating constructor
*/
public FolderCrawler() {
super();
}
/**
* main method
*
* @param ags
*/
public static void main(String[] args) {
FolderCrawler crawler = new FolderCrawler();
/**
* Gets all the file and directories and prints accordingly
*
* @param directory
* Directory path where it should search
*/
public void directoryCrawler(File directory) {
// Get List of files in folder and print
File[] filesAndDirs = directory.listFiles();
// Print the root directory name
System.out.println(“-” + directory.getName());
// Iterate the list of files, if it is identified as not a file call
// directoryCrawler method to list all the files in that directory.
for (File file : filesAndDirs) {