In standard applications, app logs are implemented into a single file which can be read for debugging purposes. However, apps which follows microservices architecture style comprises multiple small apps and multiple log files are to maintained to have at least one file per microservice. Due to this , identification and correlation of logs to a specific request chain becomes difficult.
For this, distributed logging & tracing mechanism can be implemented using tools like Sleuth, Zipkin, ELK etc
How to use Sleuth?
Sleuth is part of spring cloud libraries. It can be used to generate the traceid, spanid and add this information to the service calls in headers and mapped diagnostic context (MDC). These ids can be used by the tools such as Zipkin, ELK to store, index and process the log file.
To use sleuth in the app, following dependencies needs to be added
<dependency>
<groupId>org.springframework.cloud</groupId>
<artifactId>spring-cloud-starter-sleuth</artifactId>
</dependency>
How to use Zipkin?
Zipkin contains two components
- Zipkin Client
- Zipkin Server
Zipkin client contains Sampler which collects data from ms apps with the help of sleuth and provides it the zipkin server.
To use zipkin client following dependency needs to be added in the application
<dependency>
<groupId>org.springframework.cloud</groupId>
<artifactId>spring-cloud-starter-zipkin</artifactId>
</dependency>
To use zipkin server, we need to download and set up the server in our system
- Download zipkin from below link https://www.mediafire.com/file/jmpqrenm0yudehy/ZipkinExecutable.zip/file
- Extract and run the jar using command prompt
- java -jar zipkin-server-2.12.9-exec.jar
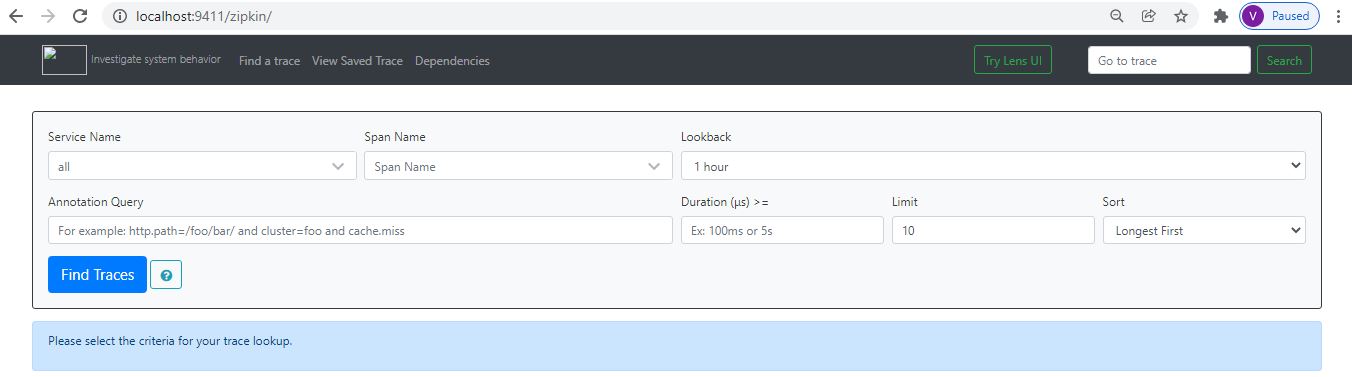
- Once Zipkin is started, we can see the Web UI at http://localhost:9411/zipkin/.
Implementation on microservice apps
To see distributed logging implementation, we need to create three services with the same configuration, the only difference has to be the service invocation details where the endpoint changes.
- Create services as Spring boot applications with Web, Rest Repository, Zipkin and Sleuth dependencies.
- Package services inside a single parent project so that three services can be built together. Also, I’ve added useful windows scripts in github repo to start/stop all the services with a single command
- Below is one rest controller in service1 which exposes one endpoint and also invokes one downstream service using the RestTemplate. Also, we are using Sampler.ALWAYS_SAMPLE that traces each action.
Service 1
package com.mvtechbytes.service1;

import brave.sampler.Sampler;
import org.apache.log4j.Logger;
import org.springframework.beans.factory.annotation.Autowired;
import org.springframework.boot.SpringApplication;
import org.springframework.boot.autoconfigure.SpringBootApplication;
import org.springframework.context.annotation.Bean;
import org.springframework.core.ParameterizedTypeReference;
import org.springframework.http.HttpMethod;
import org.springframework.web.bind.annotation.GetMapping;
import org.springframework.web.bind.annotation.RestController;
import org.springframework.web.client.RestTemplate;

@SpringBootApplication
public class Service1Application {

    public static void main(String[] args) {
        SpringApplication.run(Service1Application.class, args);
    }
}

@RestController
class Service1Controller {

    private static final Logger LOG = Logger.getLogger(Service1Controller.class.getName());

    @Autowired
    RestTemplate restTemplate;

    @Bean
    public RestTemplate getRestTemplate() {
        return new RestTemplate();
    }

    @Bean
    public Sampler alwaysSampler() {
        return Sampler.ALWAYS_SAMPLE;
    }

    @GetMapping(value="/service1")
    public String service1()
    {
        LOG.info("Inside Service 1..");
String response = (String)   restTemplate.exchange("http://localhost:8082/service2", HttpMethod.GET, null, new ParameterizedTypeReference<String>() {}).getBody();
        return response;
    }
}
Appication Configuration
As all services will run in a single machine, so we need to run them in different ports. Also to identify in Zipkin, we need to give proper names. so configure the application name and port information in application.properties file under the resources folder.
application.propertiesserver.port = 8081
spring.application.name = zipkin-server1
Similarly, for the other 2 services, we will use ports 8082, 8083 and their name will also be zipkin-server2 and zipkin-server3
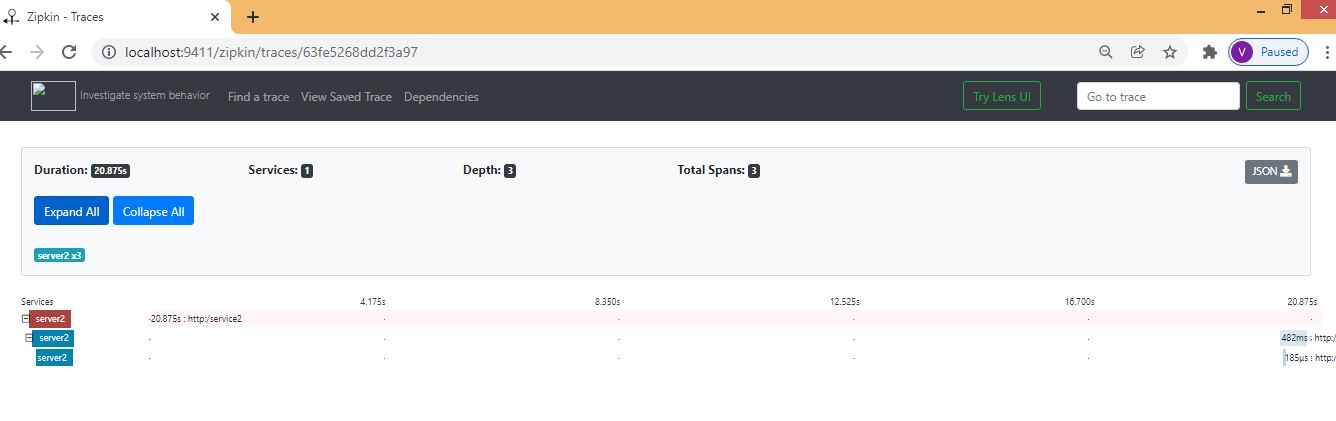
Also, we have intentionally introduced a delay in the second service so that we can view that in Zipkin.
Above project is available in below github location
Github repo : https://github.com/mvtechbytes/Zipkin-Sleuth
On running app using bat files


References


