Spring Core – Hello World Example


Pre Requisite :

Download and install the Spring STS into your machine. This will provide all the default spring configurations whenever you create the project

Application Creation Steps:

Step 1: Spring Maven project in your STS. This gives the project folder structure and one pom.xml file in root folder. Below is the Sample pom Xml.

<project xmlns=”http://maven.apache.org/POM/4.0.0&#8243; xmlns:xsi=”http://www.w3.org/2001/XMLSchema-instance&#8221; xsi:schemaLocation=”http://maven.apache.org/POM/4.0.0 http://maven.apache.org/xsd/maven-4.0.0.xsd”&gt;
<modelVersion>4.0.0</modelVersion>
<groupId>org.springframework.samples</groupId>
<artifactId>Spring-Project</artifactId>
<version>0.0.1-SNAPSHOT</version>

<properties>

<!– Generic properties –>
<java.version>1.6</java.version>
<project.build.sourceEncoding>UTF-8</project.build.sourceEncoding>
<project.reporting.outputEncoding>UTF-8</project.reporting.outputEncoding>

<!– Spring –>
<spring-framework.version>3.2.3.RELEASE</spring-framework.version>

<!– Hibernate / JPA –>
<hibernate.version>4.2.1.Final</hibernate.version>

<!– Logging –>
<logback.version>1.0.13</logback.version>
<slf4j.version>1.7.5</slf4j.version>

<!– Test –>
<junit.version>4.11</junit.version>

</properties>

<dependencies>
<!– Spring and Transactions –>
<dependency>
<groupId>org.springframework</groupId>
<artifactId>spring-context</artifactId>
<version>${spring-framework.version}</version>
</dependency>
<dependency>
<groupId>org.springframework</groupId>
<artifactId>spring-tx</artifactId>
<version>${spring-framework.version}</version>
</dependency>

<!– Logging with SLF4J & LogBack –>
<dependency>
<groupId>org.slf4j</groupId>
<artifactId>slf4j-api</artifactId>
<version>${slf4j.version}</version>
<scope>compile</scope>
</dependency>
<dependency>
<groupId>ch.qos.logback</groupId>
<artifactId>logback-classic</artifactId>
<version>${logback.version}</version>
<scope>runtime</scope>
</dependency>

<!– Hibernate –>
<dependency>
<groupId>org.hibernate</groupId>
<artifactId>hibernate-entitymanager</artifactId>
<version>${hibernate.version}</version>
</dependency>
<!– Test Artifacts –>
<dependency>
<groupId>org.springframework</groupId>
<artifactId>spring-test</artifactId>
<version>${spring-framework.version}</version>
<scope>test</scope>
</dependency>
<dependency>
<groupId>junit</groupId>
<artifactId>junit</artifactId>
<version>${junit.version}</version>
<scope>test</scope>
</dependency>

</dependencies>
</project>

Step 2: Create the bean class HelloWorldBean.java as below

package in.malliktalksjava.spring.examples;

public class HelloWorldBean {

private String message;

public void setMessage(String message){
this.message = message;
}

public void printMessage(){
System.out.println(“You are in Print Message : “+message);
}
}

Step 3: Create Beans Xml file and configure the HellowWorldBean into that file to make use of dependency injection.

<?xml version=”1.0″ encoding=”UTF-8″?>
<beans xmlns=”http://www.springframework.org/schema/beans&#8221;
xmlns:xsi=”http://www.w3.org/2001/XMLSchema-instance&#8221;
xsi:schemaLocation=”http://www.springframework.org/schema/beans http://www.springframework.org/schema/beans/spring-beans-3.2.xsd”&gt;
<bean id=”helloWorldBean” class=”in.malliktalksjava.spring.examples.HelloWorldBean”>
<property name=”message” value=”Hello World”></property>
</bean>

</beans>

Step 4: Create the Main Application class SpringCoreBeansXmlExample.java and load the beans xml

package in.malliktalksjava.spring.examples;

import org.springframework.context.ApplicationContext;
import org.springframework.context.support.ClassPathXmlApplicationContext;

/**
* @author mallikarjungunda
*
*/
public class SpringCoreBeansXmlExample {

/**
* @param args
*/
public static void main(String[] args) {

//Load the beans.xml into Application Context
ApplicationContext context = new ClassPathXmlApplicationContext(“beans.xml”);

//Inject the object whenever required
HelloWorldBean helloWorldBean = (HelloWorldBean)context.getBean(“helloWorldBean”);

helloWorldBean.printMessage();
}
}

Below is the out put that prints whenever you run the class.

You are in Print Message : Hello World


Thank you for going through the this example. Refer to Menu bar for other tutorials.

Basic Spring MVC Application


This post explains how to create spring based web application.

Folder Structure:

Typical folder structure of the spring web application contains as below.

Folder Structure

web.xml:

Below is the web.xml file which contains the spring configuration. DispatcherServlet is controller of the spring mvc application, all the requests which coming to the application will be passed through it.  DispatcherServlet loads the spring-context.xml file during server start up and keeps the all the configurations in servlet context. Action path configured for this applications is *.html.

<?xml version=”1.0″ encoding=”UTF-8″?>
<web-app xmlns:xsi=”http://www.w3.org/2001/XMLSchema-instance&#8221;
xmlns=”http://java.sun.com/xml/ns/javaee&#8221;
xmlns:web=”http://java.sun.com/xml/ns/javaee/web-app_2_5.xsd&#8221;
xsi:schemaLocation=”http://java.sun.com/xml/ns/javaee http://java.sun.com/xml/ns/javaee/web-app_2_5.xsd&#8221;
id=”WebApp_ID” version=”2.5″>

<display-name>Spring Hello World</display-name>

<welcome-file-list>
<welcome-file>/</welcome-file>
<welcome-file>index.jsp</welcome-file>
</welcome-file-list>

<servlet>
<servlet-name>springDispatcher</servlet-name>
<servlet-class>
org.springframework.web.servlet.DispatcherServlet
</servlet-class>
<init-param>
<param-name>contextConfigLocation</param-name>
<param-value>/config/spring-context.xml</param-value>
</init-param>
<load-on-startup>1</load-on-startup>
</servlet>
<servlet-mapping>
<servlet-name>springDispatcher</servlet-name>
<url-pattern>*.html</url-pattern>
</servlet-mapping>
</web-app>

index.jsp:

index.jsp file configured in web.xml as a welcome file, so this file will be loaded when user hit the http://localhost:8080/SpringMVC/ url in the browser.

<jsp:forward page=”sayhello.html”></jsp:forward>

HelloWorldController.java:

When ever index.jsp loaded into the browser, it will forward the request to sayhello.html. This sayhello request is mapped to sayHello() method in HelloWorldController class. So, sayHello() method will be executed and it will return the ‘hello’ string after completion of method execution.

package in.javatutorials.spring.controller;

import org.springframework.stereotype.Controller;
import org.springframework.web.bind.annotation.RequestMapping;
import org.springframework.web.bind.annotation.RequestMethod;

/**
*
* @author Javatutorials
*
*/
@Controller
public class HelloWorldController {

/**
* Controls the ‘sayhello’ and return to hello.jsp
* @return
*/
@RequestMapping(value = “/sayhello”, method = RequestMethod.GET)
public String sayHello() {

System.out.println(“Sample Spring Application”);

return “hello”;
}

}

spring-context.xml:

Package of HelloWorldController  class is configured as a controller package in the spring-context file as mentioned below. This sample application is configured with the InternalResourceViewResolver, when ever sayHello() method returns the hello string, request will be redirected to hello.jsp based upon the InternalResourceViewResolver configuration as mentioned in the below file.

<?xml version=”1.0″ encoding=”UTF-8″?>
<beans xmlns=”http://www.springframework.org/schema/beans&#8221;
xmlns:xsi=”http://www.w3.org/2001/XMLSchema-instance&#8221; xmlns:mvc=”http://www.springframework.org/schema/mvc&#8221;
xmlns:context=”http://www.springframework.org/schema/context&#8221;
xsi:schemaLocation=”
http://www.springframework.org/schema/mvc http://www.springframework.org/schema/mvc/spring-mvc-3.0.xsd
http://www.springframework.org/schema/beans http://www.springframework.org/schema/beans/spring-beans-3.0.xsd
http://www.springframework.org/schema/context http://www.springframework.org/schema/context/spring-context-3.0.xsd”&gt;

<context:component-scan base-package=”in.javatutorials.spring.controller” />
<mvc:annotation-driven />

<bean
class=”org.springframework.web.servlet.view.InternalResourceViewResolver”>
<property name=”prefix” value=”/jsp/” />
<property name=”suffix” value=”.jsp” />
</bean>

</beans>

hello.jsp:

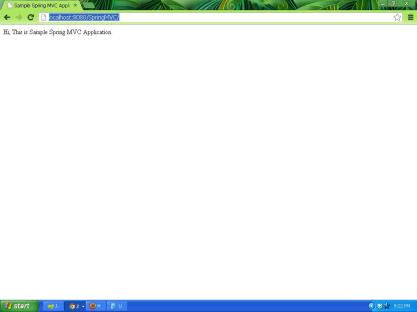
Finally ‘Hi, This is Sample Spring MVC Application’ message will be shown to the user as it is mentioned in the below jsp.

<%@ page language=”java” contentType=”text/html; charset=ISO-8859-1″
pageEncoding=”ISO-8859-1″%>
<!DOCTYPE html PUBLIC “-//W3C//DTD HTML 4.01 Transitional//EN” “http://www.w3.org/TR/html4/loose.dtd”&gt;
<html>
<head>
<meta http-equiv=”Content-Type” content=”text/html; charset=ISO-8859-1″>
<title>Sample Spring MVC Application</title>
</head>
<body>Hi, This is Sample Spring MVC Application
</body>
</html>

Access the application in Browser:

http://localhost:8080/SpringMVC/

Application Browser

Please click on the below link to download the complete application : Click here

Other Useful links:

Spring MVC with Tiles framework sample application

differences between DispatchAction and LookupDispatchAction in Struts Framework

Create a Java web service using top down approch

Example programs for SOAP webservice client

Spring MVC with Tiles framework sample application


Below post talks about the Spring MVC integration with the tiles framework.

You can build developer friendly and user friendly web applications using the tiles framework.

Basic Folder structure of the application:

Typical folder structure of the Spring MVC application has mentioned below:

Spring MVC Application folder structure


Web.xml:

Below is the web.xml file which contains the spring configuration. DispatcherServlet is controller of the spring mvc application, all the requests which coming to the application will be passed through it. DispatcherServlet loads the spring-context.xml file during server start up and keeps the all the configurations in servlet context. Action path configured for this applications is *.html.

<?xml version=”1.0″ encoding=”UTF-8″?>
<web-app xmlns:xsi=”http://www.w3.org/2001/XMLSchema-instance&#8221;
xmlns=”http://java.sun.com/xml/ns/javaee&#8221;
xmlns:web=”http://java.sun.com/xml/ns/javaee/web-app_2_5.xsd&#8221;
xsi:schemaLocation=”http://java.sun.com/xml/ns/javaee http://java.sun.com/xml/ns/javaee/web-app_2_5.xsd&#8221;
id=”WebApp_ID” version=”2.5″>
<display-name>Spring Hello World</display-name>
<welcome-file-list>
<welcome-file>/</welcome-file>
<welcome-file>index.jsp</welcome-file>
</welcome-file-list>

<servlet>
<servlet-name>springDispatcher</servlet-name>
<servlet-class>
org.springframework.web.servlet.DispatcherServlet
</servlet-class>
<init-param>
<param-name>contextConfigLocation</param-name>
<param-value>/config/spring-context.xml</param-value>
</init-param>
<load-on-startup>1</load-on-startup>
</servlet>
<servlet-mapping>
<servlet-name>springDispatcher</servlet-name>
<url-pattern>*.html</url-pattern>
</servlet-mapping>
</web-app>

index.jsp:

index.jsp file configured in web.xml as a welcome file, so this file will be loaded when user hit the http://localhost:8080/SpringMVC/ url in the browser.

<jsp:forward page=”contacts.html”></jsp:forward>

HelloWorldController .java:

When ever index.jsp loaded into the browser, it will forward the request to contacts.html. This contacts request is mapped to contollContacts() method in HelloWorldController class. So, contollContacts() method will be executed and it will return the ‘contact’ string after completion of method execution.

package in.javatutorials.spring.controller;

import org.springframework.stereotype.Controller;
import org.springframework.web.bind.annotation.RequestMapping;
import org.springframework.web.bind.annotation.RequestMethod;

/**
*
* @author Javatutorials
*
*/
@Controller
public class HelloWorldController {

/**
* Controls the ‘contacts’ and return to respective layout page
* @return
*/
@RequestMapping(value = “/contacts”, method = RequestMethod.GET)
public String contollContacts() {

String message = “Hi, You are in Controller !!!”;
System.out.println(message);

return “contact”;
}

}


spring-context.xml:

As the Tiles framework has been configured in the spring-context file as below with UrlBasedViewResolver, whenever contact will be returned by contollContacts() methods, request will be reached to tiles.xml and contact tile configuration will be loaded.

<?xml version=”1.0″ encoding=”UTF-8″?>
<beans xmlns=”http://www.springframework.org/schema/beans&#8221;
xmlns:xsi=”http://www.w3.org/2001/XMLSchema-instance&#8221; xmlns:mvc=”http://www.springframework.org/schema/mvc&#8221;
xmlns:context=”http://www.springframework.org/schema/context&#8221;
xsi:schemaLocation=”
http://www.springframework.org/schema/mvc http://www.springframework.org/schema/mvc/spring-mvc-3.0.xsd
http://www.springframework.org/schema/beans http://www.springframework.org/schema/beans/spring-beans-3.0.xsd
http://www.springframework.org/schema/context http://www.springframework.org/schema/context/spring-context-3.0.xsd”&gt;

<context:component-scan base-package=”in.javatutorials.spring.controller” />
<mvc:annotation-driven />

<bean id=”viewResolver”
class=”org.springframework.web.servlet.view.UrlBasedViewResolver”>
<property name=”viewClass”>
<value>
org.springframework.web.servlet.view.tiles2.TilesView
</value>
</property>
</bean>
<bean id=”tilesConfigurer”
class=”org.springframework.web.servlet.view.tiles2.TilesConfigurer”>
<property name=”definitions”>
<list>
<value>/config/tiles.xml</value>
</list>
</property>
</bean>

</beans>


tiles.xml:

Below will be the tiles configuration made for our sample application. contact tiles definition is extending to base.definition and base definition will be using layout.jsp as the layout file for our application.

<?xml version=”1.0″ encoding=”UTF-8″ ?>
<!DOCTYPE tiles-definitions PUBLIC
“-//Apache Software Foundation//DTD Tiles Configuration 2.0//EN”
http://tiles.apache.org/dtds/tiles-config_2_0.dtd”&gt;

<tiles-definitions>
<definition name=”base.definition” template=”/jsp/layout.jsp”>
<put-attribute name=”title” value=”” />
<put-attribute name=”header” value=”/jsp/header.jsp” />
<put-attribute name=”menu” value=”/jsp/menu.jsp” />
<put-attribute name=”body” value=”” />
<put-attribute name=”footer” value=”/jsp/footer.jsp” />
</definition>

<definition name=”contact” extends=”base.definition”>
<put-attribute name=”title”
value=”Sample Spring MVC With Tiles Appliacation” />
<put-attribute name=”body” value=”/jsp/contact.jsp” />
</definition>

</tiles-definitions>

layout.jsp:

This layout.jsp is divided the complete application page as header, menu, body, footer. So, once the layout.jsp called, all the other jsps will be included as per the configuration mentioned in the tiles.xml file.

<%@ taglib uri=”http://tiles.apache.org/tags-tiles&#8221; prefix=”tiles”%>
<!DOCTYPE HTML PUBLIC “-//W3C//DTD HTML 4.01 Transitional//EN”
http://www.w3.org/TR/html4/loose.dtd”&gt;
<html>
<head>
<meta http-equiv=”Content-Type” content=”text/html; charset=UTF-8″>
<title><tiles:insertAttribute name=”title” ignore=”true” /></title>
</head>
<body>
<table border=”1″ cellpadding=”2″ cellspacing=”2″ align=”center”>
<tr>
<td height=”30″ colspan=”2″><tiles:insertAttribute name=”header” />
</td>
</tr>
<tr>
<td height=”250″><tiles:insertAttribute name=”menu” /></td>
<td width=”350″><tiles:insertAttribute name=”body” /></td>
</tr>
<tr>
<td height=”30″ colspan=”2″><tiles:insertAttribute name=”footer” />
</td>
</tr>
</table>
</body>
</html>


header.jsp:

<h1>Header</h1>


menu.jsp:

<p>Menu</p>


footer.jsp:

<h1>Footer page</h1>


contact.jsp:

<%@taglib uri=”http://www.springframework.org/tags/form&#8221; prefix=”form”%>
<html>
<head>
<title>Sample Spring MVC With Tiles Appliacation</title>
</head>
<body>
<h2>Sample Spring MVC With Tiles Appliacation</h2>
<%
System.out.println(“Contact jsp”);
%>

</body>
</html>


Final Output of the Application:

When ever user hits the below url in the browser, application will be loaded as mentioned in the below screenshot.

http://localhost:8080/SpringMVC/

Sample Spring MVC With Tiles framework application


To download complete application , please click on the link below : Click here

Other Useful links:

Basic Spring MVC Application