Spring Cloud Sleuth & Zipkin – Distributed Logging and Tracing


In standard applications, app logs are implemented into a single file which can be read for debugging purposes. However, apps which follows microservices architecture style comprises multiple small apps and multiple log files are to maintained to have at least one file per microservice. Due to this , identification and correlation of logs to a specific request chain becomes difficult.

For this, distributed logging & tracing mechanism can be implemented using tools like Sleuth, Zipkin, ELK etc

How to use Sleuth?

Sleuth is part of spring cloud libraries. It can be used to generate the traceid, spanid and add this information to the service calls in headers and mapped diagnostic context (MDC). These ids can be used by the tools such as Zipkin, ELK to store, index and process the log file.

To use sleuth in the app, following dependencies needs to be added

<dependency> 
<groupId>org.springframework.cloud</groupId> 
<artifactId>spring-cloud-starter-sleuth</artifactId> 
</dependency>

How to use Zipkin?

Zipkin contains two components

  • Zipkin Client
  • Zipkin Server

Zipkin client contains Sampler which collects data from ms apps with the help of sleuth and provides it the zipkin server.

To use zipkin client following dependency needs to be added in the application

<dependency> 
<groupId>org.springframework.cloud</groupId> 
<artifactId>spring-cloud-starter-zipkin</artifactId> 
</dependency>

To use zipkin server, we need to download and set up the server in our system

zipkin server

Implementation on microservice apps

To see distributed logging implementation, we need to create three services with the same configuration, the only difference has to be the service invocation details where the endpoint changes.

  • Create services as Spring boot applications with WebRest RepositoryZipkin and Sleuth dependencies.
  • Package services inside a single parent project so that three services can be built together. Also, I’ve added useful windows scripts in github repo to start/stop all the services with a single command
  • Below is one rest controller in service1 which exposes one endpoint and also invokes one downstream service using the RestTemplate. Also, we are using Sampler.ALWAYS_SAMPLE that traces each action.

Service 1

package com.mvtechbytes.service1;
 
import brave.sampler.Sampler;
import org.apache.log4j.Logger;
import org.springframework.beans.factory.annotation.Autowired;
import org.springframework.boot.SpringApplication;
import org.springframework.boot.autoconfigure.SpringBootApplication;
import org.springframework.context.annotation.Bean;
import org.springframework.core.ParameterizedTypeReference;
import org.springframework.http.HttpMethod;
import org.springframework.web.bind.annotation.GetMapping;
import org.springframework.web.bind.annotation.RestController;
import org.springframework.web.client.RestTemplate;
 
@SpringBootApplication
public class Service1Application {
 
    public static void main(String[] args) {
        SpringApplication.run(Service1Application.class, args);
    }
}
 
@RestController
class Service1Controller {

    private static final Logger LOG = Logger.getLogger(Service1Controller.class.getName());
     
    @Autowired
    RestTemplate restTemplate;
 
    @Bean
    public RestTemplate getRestTemplate() {
        return new RestTemplate();
    }
 
    @Bean
    public Sampler alwaysSampler() {
        return Sampler.ALWAYS_SAMPLE;
    }
     
    @GetMapping(value="/service1")
    public String service1() 
    {
        LOG.info("Inside Service 1..");         
String response = (String)   restTemplate.exchange("http://localhost:8082/service2", HttpMethod.GET, null, new ParameterizedTypeReference<String>() {}).getBody();
        return response;
    }
}

Appication Configuration

As all services will run in a single machine, so we need to run them in different ports. Also to identify in Zipkin, we need to give proper names. so configure the application name and port information in application.properties file under the resources folder.

application.propertiesserver.port = 8081
spring.application.name = zipkin-server1

Similarly, for the other 2 services, we will use ports 8082, 8083 and their name will also be zipkin-server2 and zipkin-server3

Also, we have intentionally introduced a delay in the second service so that we can view that in Zipkin.

Above project is available in below github location

Github repo : https://github.com/mvtechbytes/Zipkin-Sleuth

On running app using bat files

Find Traces
Individual Trace
Trace details

References

Different Types of Spring Containers


There are two distinct types of spring containers as mentioned below:

1. BeanFactory Container:

  • This is the simplest container providing basic support for Dependency Injection and defined by the org.springframework.beans.factory.BeanFactory interface. Related interfaces, such as BeanFactoryAware, InitializingBean, DisposableBean, can provide callbacks which can be configured for the different phases of the Spring Bean’s life cycle.
  • BeanFactory, by default lazy loads the beans, it creates the bean only when the getBean() method is called.

2. ApplicationContext Container:

  • This container adds more enterprise-specific functionalities such as ability to resolve textual messages from a properties file and ability to publish application events to the interested event listeners. This container is defined by org.springframework.context.ApplicationContext interface.
  • ApplicationContext loads all Spring Beans upon start-up unlike BeanFactory.

ApplicationContext container includes all functionality of the BeanFactory container, so it is generally recommended over the BeanFactory. BeanFactory can be used for light weight applications like mobile devices or applet based applications where data volume and speed is significant.


Spring Core – Hello World Example


Pre Requisite :

Download and install the Spring STS into your machine. This will provide all the default spring configurations whenever you create the project

Application Creation Steps:

Step 1: Spring Maven project in your STS. This gives the project folder structure and one pom.xml file in root folder. Below is the Sample pom Xml.

<project xmlns=”http://maven.apache.org/POM/4.0.0&#8243; xmlns:xsi=”http://www.w3.org/2001/XMLSchema-instance&#8221; xsi:schemaLocation=”http://maven.apache.org/POM/4.0.0 http://maven.apache.org/xsd/maven-4.0.0.xsd”&gt;
<modelVersion>4.0.0</modelVersion>
<groupId>org.springframework.samples</groupId>
<artifactId>Spring-Project</artifactId>
<version>0.0.1-SNAPSHOT</version>

<properties>

<!– Generic properties –>
<java.version>1.6</java.version>
<project.build.sourceEncoding>UTF-8</project.build.sourceEncoding>
<project.reporting.outputEncoding>UTF-8</project.reporting.outputEncoding>

<!– Spring –>
<spring-framework.version>3.2.3.RELEASE</spring-framework.version>

<!– Hibernate / JPA –>
<hibernate.version>4.2.1.Final</hibernate.version>

<!– Logging –>
<logback.version>1.0.13</logback.version>
<slf4j.version>1.7.5</slf4j.version>

<!– Test –>
<junit.version>4.11</junit.version>

</properties>

<dependencies>
<!– Spring and Transactions –>
<dependency>
<groupId>org.springframework</groupId>
<artifactId>spring-context</artifactId>
<version>${spring-framework.version}</version>
</dependency>
<dependency>
<groupId>org.springframework</groupId>
<artifactId>spring-tx</artifactId>
<version>${spring-framework.version}</version>
</dependency>

<!– Logging with SLF4J & LogBack –>
<dependency>
<groupId>org.slf4j</groupId>
<artifactId>slf4j-api</artifactId>
<version>${slf4j.version}</version>
<scope>compile</scope>
</dependency>
<dependency>
<groupId>ch.qos.logback</groupId>
<artifactId>logback-classic</artifactId>
<version>${logback.version}</version>
<scope>runtime</scope>
</dependency>

<!– Hibernate –>
<dependency>
<groupId>org.hibernate</groupId>
<artifactId>hibernate-entitymanager</artifactId>
<version>${hibernate.version}</version>
</dependency>
<!– Test Artifacts –>
<dependency>
<groupId>org.springframework</groupId>
<artifactId>spring-test</artifactId>
<version>${spring-framework.version}</version>
<scope>test</scope>
</dependency>
<dependency>
<groupId>junit</groupId>
<artifactId>junit</artifactId>
<version>${junit.version}</version>
<scope>test</scope>
</dependency>

</dependencies>
</project>

Step 2: Create the bean class HelloWorldBean.java as below

package in.malliktalksjava.spring.examples;

public class HelloWorldBean {

private String message;

public void setMessage(String message){
this.message = message;
}

public void printMessage(){
System.out.println(“You are in Print Message : “+message);
}
}

Step 3: Create Beans Xml file and configure the HellowWorldBean into that file to make use of dependency injection.

<?xml version=”1.0″ encoding=”UTF-8″?>
<beans xmlns=”http://www.springframework.org/schema/beans&#8221;
xmlns:xsi=”http://www.w3.org/2001/XMLSchema-instance&#8221;
xsi:schemaLocation=”http://www.springframework.org/schema/beans http://www.springframework.org/schema/beans/spring-beans-3.2.xsd”&gt;
<bean id=”helloWorldBean” class=”in.malliktalksjava.spring.examples.HelloWorldBean”>
<property name=”message” value=”Hello World”></property>
</bean>

</beans>

Step 4: Create the Main Application class SpringCoreBeansXmlExample.java and load the beans xml

package in.malliktalksjava.spring.examples;

import org.springframework.context.ApplicationContext;
import org.springframework.context.support.ClassPathXmlApplicationContext;

/**
* @author mallikarjungunda
*
*/
public class SpringCoreBeansXmlExample {

/**
* @param args
*/
public static void main(String[] args) {

//Load the beans.xml into Application Context
ApplicationContext context = new ClassPathXmlApplicationContext(“beans.xml”);

//Inject the object whenever required
HelloWorldBean helloWorldBean = (HelloWorldBean)context.getBean(“helloWorldBean”);

helloWorldBean.printMessage();
}
}

Below is the out put that prints whenever you run the class.

You are in Print Message : Hello World


Thank you for going through the this example. Refer to Menu bar for other tutorials.

List of View Resolvers in Spring MVC


In Spring MVC, view resolvers enable you to render models in a browser without tying you to a specific view technology like JSP, Velocity, XML…etc.

There are two interfaces that are important to the way Spring handles views are ViewResolver and View. The ViewResolver provides a mapping between view names and actual views. The View interface addresses the preparation of the request and hands the request over to one of the view technologies.

Below are the important view resolvers provided by spring framework:

  1. AbstractCachingViewResolver : Abstract view resolver that caches views. Often views need preparation before they can be used; extending this view resolver provides caching.
  2. XmlViewResolver : Implementation of ViewResolver that accepts a configuration file written in XML with the same DTD as Spring’s XML bean factories. The default configuration file is /WEB-INF/views.xml.
  3. ResourceBundleViewResolver : Implementation of ViewResolver that uses bean definitions in a ResourceBundle, specified by the bundle base name. Typically you define the bundle in a properties file, located in the classpath. The default file name is views.properties.
  4. UrlBasedViewResolver : Simple implementation of the ViewResolver interface that effects the direct resolution of logical view names to URLs, without an explicit mapping definition. This is appropriate if your logical names match the names of your view resources in a straightforward manner, without the need for arbitrary mappings.
  5. InternalResourceViewResolver :  Convenient subclass of UrlBasedViewResolver that supports InternalResourceView (in effect, Servlets and JSPs) and subclasses such as JstlView and TilesView. You can specify the view class for all views generated by this resolver by using setViewClass(..).
  6. VelocityViewResolver/FreeMarkerViewResolver : Convenient subclass of UrlBasedViewResolver that supports VelocityView (in effect, Velocity templates) or FreeMarkerView ,respectively, and custom subclasses of them.
  7. ContentNegotiatingViewResolver : Implementation of the ViewResolver interface that resolves a view based on the request file name or Accept header.

Other Useful Links:

Basic Spring MVC Application

Spring MVC with Tiles framework sample application

Basic Spring MVC Application


This post explains how to create spring based web application.

Folder Structure:

Typical folder structure of the spring web application contains as below.

Folder Structure

web.xml:

Below is the web.xml file which contains the spring configuration. DispatcherServlet is controller of the spring mvc application, all the requests which coming to the application will be passed through it.  DispatcherServlet loads the spring-context.xml file during server start up and keeps the all the configurations in servlet context. Action path configured for this applications is *.html.

<?xml version=”1.0″ encoding=”UTF-8″?>
<web-app xmlns:xsi=”http://www.w3.org/2001/XMLSchema-instance&#8221;
xmlns=”http://java.sun.com/xml/ns/javaee&#8221;
xmlns:web=”http://java.sun.com/xml/ns/javaee/web-app_2_5.xsd&#8221;
xsi:schemaLocation=”http://java.sun.com/xml/ns/javaee http://java.sun.com/xml/ns/javaee/web-app_2_5.xsd&#8221;
id=”WebApp_ID” version=”2.5″>

<display-name>Spring Hello World</display-name>

<welcome-file-list>
<welcome-file>/</welcome-file>
<welcome-file>index.jsp</welcome-file>
</welcome-file-list>

<servlet>
<servlet-name>springDispatcher</servlet-name>
<servlet-class>
org.springframework.web.servlet.DispatcherServlet
</servlet-class>
<init-param>
<param-name>contextConfigLocation</param-name>
<param-value>/config/spring-context.xml</param-value>
</init-param>
<load-on-startup>1</load-on-startup>
</servlet>
<servlet-mapping>
<servlet-name>springDispatcher</servlet-name>
<url-pattern>*.html</url-pattern>
</servlet-mapping>
</web-app>

index.jsp:

index.jsp file configured in web.xml as a welcome file, so this file will be loaded when user hit the http://localhost:8080/SpringMVC/ url in the browser.

<jsp:forward page=”sayhello.html”></jsp:forward>

HelloWorldController.java:

When ever index.jsp loaded into the browser, it will forward the request to sayhello.html. This sayhello request is mapped to sayHello() method in HelloWorldController class. So, sayHello() method will be executed and it will return the ‘hello’ string after completion of method execution.

package in.javatutorials.spring.controller;

import org.springframework.stereotype.Controller;
import org.springframework.web.bind.annotation.RequestMapping;
import org.springframework.web.bind.annotation.RequestMethod;

/**
*
* @author Javatutorials
*
*/
@Controller
public class HelloWorldController {

/**
* Controls the ‘sayhello’ and return to hello.jsp
* @return
*/
@RequestMapping(value = “/sayhello”, method = RequestMethod.GET)
public String sayHello() {

System.out.println(“Sample Spring Application”);

return “hello”;
}

}

spring-context.xml:

Package of HelloWorldController  class is configured as a controller package in the spring-context file as mentioned below. This sample application is configured with the InternalResourceViewResolver, when ever sayHello() method returns the hello string, request will be redirected to hello.jsp based upon the InternalResourceViewResolver configuration as mentioned in the below file.

<?xml version=”1.0″ encoding=”UTF-8″?>
<beans xmlns=”http://www.springframework.org/schema/beans&#8221;
xmlns:xsi=”http://www.w3.org/2001/XMLSchema-instance&#8221; xmlns:mvc=”http://www.springframework.org/schema/mvc&#8221;
xmlns:context=”http://www.springframework.org/schema/context&#8221;
xsi:schemaLocation=”
http://www.springframework.org/schema/mvc http://www.springframework.org/schema/mvc/spring-mvc-3.0.xsd
http://www.springframework.org/schema/beans http://www.springframework.org/schema/beans/spring-beans-3.0.xsd
http://www.springframework.org/schema/context http://www.springframework.org/schema/context/spring-context-3.0.xsd”&gt;

<context:component-scan base-package=”in.javatutorials.spring.controller” />
<mvc:annotation-driven />

<bean
class=”org.springframework.web.servlet.view.InternalResourceViewResolver”>
<property name=”prefix” value=”/jsp/” />
<property name=”suffix” value=”.jsp” />
</bean>

</beans>

hello.jsp:

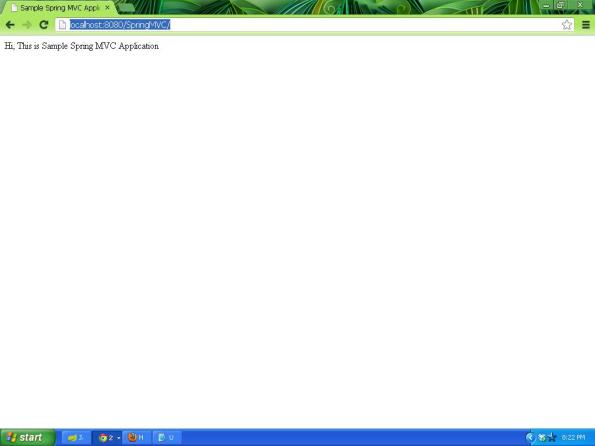
Finally ‘Hi, This is Sample Spring MVC Application’ message will be shown to the user as it is mentioned in the below jsp.

<%@ page language=”java” contentType=”text/html; charset=ISO-8859-1″
pageEncoding=”ISO-8859-1″%>
<!DOCTYPE html PUBLIC “-//W3C//DTD HTML 4.01 Transitional//EN” “http://www.w3.org/TR/html4/loose.dtd”&gt;
<html>
<head>
<meta http-equiv=”Content-Type” content=”text/html; charset=ISO-8859-1″>
<title>Sample Spring MVC Application</title>
</head>
<body>Hi, This is Sample Spring MVC Application
</body>
</html>

Access the application in Browser:

http://localhost:8080/SpringMVC/

Application Browser

Please click on the below link to download the complete application : Click here

Other Useful links:

Spring MVC with Tiles framework sample application

differences between DispatchAction and LookupDispatchAction in Struts Framework

Create a Java web service using top down approch

Example programs for SOAP webservice client

Spring MVC with Tiles framework sample application


Below post talks about the Spring MVC integration with the tiles framework.

You can build developer friendly and user friendly web applications using the tiles framework.

Basic Folder structure of the application:

Typical folder structure of the Spring MVC application has mentioned below:

Spring MVC Application folder structure


Web.xml:

Below is the web.xml file which contains the spring configuration. DispatcherServlet is controller of the spring mvc application, all the requests which coming to the application will be passed through it. DispatcherServlet loads the spring-context.xml file during server start up and keeps the all the configurations in servlet context. Action path configured for this applications is *.html.

<?xml version=”1.0″ encoding=”UTF-8″?>
<web-app xmlns:xsi=”http://www.w3.org/2001/XMLSchema-instance&#8221;
xmlns=”http://java.sun.com/xml/ns/javaee&#8221;
xmlns:web=”http://java.sun.com/xml/ns/javaee/web-app_2_5.xsd&#8221;
xsi:schemaLocation=”http://java.sun.com/xml/ns/javaee http://java.sun.com/xml/ns/javaee/web-app_2_5.xsd&#8221;
id=”WebApp_ID” version=”2.5″>
<display-name>Spring Hello World</display-name>
<welcome-file-list>
<welcome-file>/</welcome-file>
<welcome-file>index.jsp</welcome-file>
</welcome-file-list>

<servlet>
<servlet-name>springDispatcher</servlet-name>
<servlet-class>
org.springframework.web.servlet.DispatcherServlet
</servlet-class>
<init-param>
<param-name>contextConfigLocation</param-name>
<param-value>/config/spring-context.xml</param-value>
</init-param>
<load-on-startup>1</load-on-startup>
</servlet>
<servlet-mapping>
<servlet-name>springDispatcher</servlet-name>
<url-pattern>*.html</url-pattern>
</servlet-mapping>
</web-app>

index.jsp:

index.jsp file configured in web.xml as a welcome file, so this file will be loaded when user hit the http://localhost:8080/SpringMVC/ url in the browser.

<jsp:forward page=”contacts.html”></jsp:forward>

HelloWorldController .java:

When ever index.jsp loaded into the browser, it will forward the request to contacts.html. This contacts request is mapped to contollContacts() method in HelloWorldController class. So, contollContacts() method will be executed and it will return the ‘contact’ string after completion of method execution.

package in.javatutorials.spring.controller;

import org.springframework.stereotype.Controller;
import org.springframework.web.bind.annotation.RequestMapping;
import org.springframework.web.bind.annotation.RequestMethod;

/**
*
* @author Javatutorials
*
*/
@Controller
public class HelloWorldController {

/**
* Controls the ‘contacts’ and return to respective layout page
* @return
*/
@RequestMapping(value = “/contacts”, method = RequestMethod.GET)
public String contollContacts() {

String message = “Hi, You are in Controller !!!”;
System.out.println(message);

return “contact”;
}

}


spring-context.xml:

As the Tiles framework has been configured in the spring-context file as below with UrlBasedViewResolver, whenever contact will be returned by contollContacts() methods, request will be reached to tiles.xml and contact tile configuration will be loaded.

<?xml version=”1.0″ encoding=”UTF-8″?>
<beans xmlns=”http://www.springframework.org/schema/beans&#8221;
xmlns:xsi=”http://www.w3.org/2001/XMLSchema-instance&#8221; xmlns:mvc=”http://www.springframework.org/schema/mvc&#8221;
xmlns:context=”http://www.springframework.org/schema/context&#8221;
xsi:schemaLocation=”
http://www.springframework.org/schema/mvc http://www.springframework.org/schema/mvc/spring-mvc-3.0.xsd
http://www.springframework.org/schema/beans http://www.springframework.org/schema/beans/spring-beans-3.0.xsd
http://www.springframework.org/schema/context http://www.springframework.org/schema/context/spring-context-3.0.xsd”&gt;

<context:component-scan base-package=”in.javatutorials.spring.controller” />
<mvc:annotation-driven />

<bean id=”viewResolver”
class=”org.springframework.web.servlet.view.UrlBasedViewResolver”>
<property name=”viewClass”>
<value>
org.springframework.web.servlet.view.tiles2.TilesView
</value>
</property>
</bean>
<bean id=”tilesConfigurer”
class=”org.springframework.web.servlet.view.tiles2.TilesConfigurer”>
<property name=”definitions”>
<list>
<value>/config/tiles.xml</value>
</list>
</property>
</bean>

</beans>


tiles.xml:

Below will be the tiles configuration made for our sample application. contact tiles definition is extending to base.definition and base definition will be using layout.jsp as the layout file for our application.

<?xml version=”1.0″ encoding=”UTF-8″ ?>
<!DOCTYPE tiles-definitions PUBLIC
“-//Apache Software Foundation//DTD Tiles Configuration 2.0//EN”
http://tiles.apache.org/dtds/tiles-config_2_0.dtd”&gt;

<tiles-definitions>
<definition name=”base.definition” template=”/jsp/layout.jsp”>
<put-attribute name=”title” value=”” />
<put-attribute name=”header” value=”/jsp/header.jsp” />
<put-attribute name=”menu” value=”/jsp/menu.jsp” />
<put-attribute name=”body” value=”” />
<put-attribute name=”footer” value=”/jsp/footer.jsp” />
</definition>

<definition name=”contact” extends=”base.definition”>
<put-attribute name=”title”
value=”Sample Spring MVC With Tiles Appliacation” />
<put-attribute name=”body” value=”/jsp/contact.jsp” />
</definition>

</tiles-definitions>

layout.jsp:

This layout.jsp is divided the complete application page as header, menu, body, footer. So, once the layout.jsp called, all the other jsps will be included as per the configuration mentioned in the tiles.xml file.

<%@ taglib uri=”http://tiles.apache.org/tags-tiles&#8221; prefix=”tiles”%>
<!DOCTYPE HTML PUBLIC “-//W3C//DTD HTML 4.01 Transitional//EN”
http://www.w3.org/TR/html4/loose.dtd”&gt;
<html>
<head>
<meta http-equiv=”Content-Type” content=”text/html; charset=UTF-8″>
<title><tiles:insertAttribute name=”title” ignore=”true” /></title>
</head>
<body>
<table border=”1″ cellpadding=”2″ cellspacing=”2″ align=”center”>
<tr>
<td height=”30″ colspan=”2″><tiles:insertAttribute name=”header” />
</td>
</tr>
<tr>
<td height=”250″><tiles:insertAttribute name=”menu” /></td>
<td width=”350″><tiles:insertAttribute name=”body” /></td>
</tr>
<tr>
<td height=”30″ colspan=”2″><tiles:insertAttribute name=”footer” />
</td>
</tr>
</table>
</body>
</html>


header.jsp:

<h1>Header</h1>


menu.jsp:

<p>Menu</p>


footer.jsp:

<h1>Footer page</h1>


contact.jsp:

<%@taglib uri=”http://www.springframework.org/tags/form&#8221; prefix=”form”%>
<html>
<head>
<title>Sample Spring MVC With Tiles Appliacation</title>
</head>
<body>
<h2>Sample Spring MVC With Tiles Appliacation</h2>
<%
System.out.println(“Contact jsp”);
%>

</body>
</html>


Final Output of the Application:

When ever user hits the below url in the browser, application will be loaded as mentioned in the below screenshot.

http://localhost:8080/SpringMVC/

Sample Spring MVC With Tiles framework application


To download complete application , please click on the link below : Click here

Other Useful links:

Basic Spring MVC Application